ProtonMail offers free and premium secure email services that are designed to keep your data and identity safe. It’s also very easy to switch to ProtonMail from Gmail thanks to some built-in tools and extra apps.
Wondering what you’ll leave behind when you switch? Check out our comparison of Gmail and ProtonMail first.
Import Your Gmail Inbox to ProtonMail
The first thing you’ll want to do is bring the contents of your old inbox over to the new one. Even though ProtonMail has a generous free plan, it falls well short of what Google can offer with Gmail. One of the most limiting factors is likely to be the 500MB inbox size limit.
If you have more than 500MB of email to import, you’ll need to upgrade to a larger plan to transfer the contents of your inbox. Alternatively, wipe the slate clean and start again (but keep ahold of your Gmail account so that you still have access to your old inbox).
If space isn’t a concern, there are two ways to import your Gmail inbox to ProtonMail: by using the Import Assistant in ProtonMail V4 (free), or by using the Import-Export desktop app for Windows, Mac, and Linux (premium account required).
RELATED: What Is ProtonMail, and Why Is It More Private Than Gmail?
Use the Import Assistant in ProtonMail V4 (Free)
At the time of writing in April 2021, ProtonMail V4 is currently in beta and can be accessed via beta.protonmail.com. Beta access is available to all users of ProtonMail, as this version will eventually become the default version for anyone who uses ProtonMail in a browser.
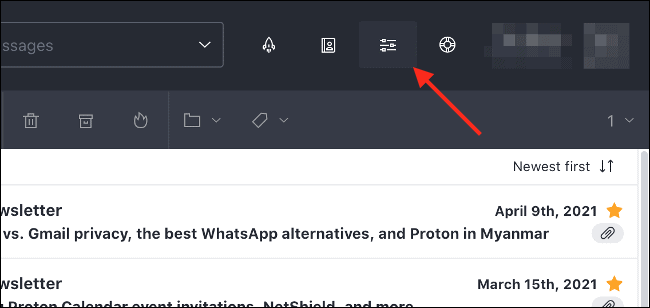
If you’re using ProtonMail V4 (or later), you’ll see it listed in the version number in the bottom left of the screen when you’re logged in. If you see an earlier version number, head to beta.protonmail.com and log in, then click on the “Settings” icon at the top of the screen.
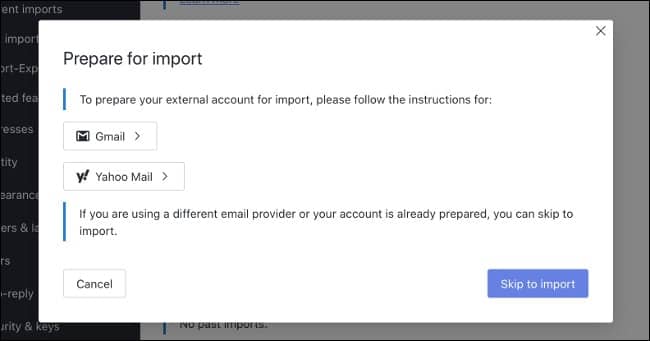
Under “Import & export,” click on “Import Assistant,” followed by “Continue with IMAP.” In the pop-up that appears, click on “Gmail” to see instructions on how to prepare your account (Don’t worry, we’ll run through them here.).
Now, head to Gmail and log in. Click on the “Settings” cog icon at the top of the screen, followed by “See all settings.” On the “Forwarding and POP/IMAP” tab, make sure that “Enable IMAP” is on so that the “Status” area reads “IMAP is enabled” in green text.
On the “Labels” tab, make sure that you enable any labels that you’d like to show up by checking them as “Show in IMAP.” If you want to avoid transferring certain labels (like chats), disable them.
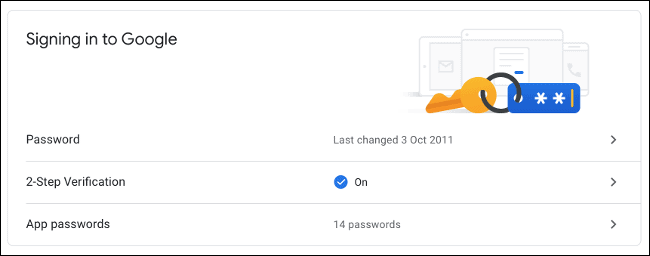
Finally, head to your Google Account settings at myaccount.google.com and log in, and then visit the Security section. Under “Less secure app access,” make sure that you click “Turn on access (not recommended).”
If you have 2-step verification enabled on your account, you’ll need to create a new app password under the “App passwords” section instead. Make a note of this password, since you’ll need it for the next step.
Next, click “Start Import Assistant” (also labeled as “Skip to Import”) to get the ball rolling. You’ll need to log in with your Gmail account by using your primary credentials (username and password), or by using your email address and app-specific password (if you have 2-step verification enabled).
Once you’re authenticated, ProtonMail will tell you exactly what will be imported. You can click on the “Customize Import” button to make further changes, like to cut-off dates and folders (labels), or hit “Start import” to begin the process.

If you don’t have enough space in your ProtonMail account for the email you wish to import, you will be warned. You can then make changes to your import so that everything fits. Learn more about importing via ProtonMail V4 on the Import Assistant support page.
Use the Import-Export Desktop App (Requires Premium)
If you have a premium ProtonMail account, you can use the dedicated Import-Export desktop app for Windows, Mac, or Linux to perform a similar import. In addition to this, you can also use the Import-Export app to import locally stored EML and MBOX files from other mail clients.
To do this, download Import-Export, and then follow the instructions to import your mail. This process can be made much easier by simply downloading your entire Gmail history in MBOX format via the official Google Takeout service.
As a paid customer, you have priority access to ProtonMail support to help you with any issues that you might encounter along the way.
Import Your Gmail Contacts to ProtonMail
You can import your contacts to ProtonMail relatively easily by exporting them as a CSV (comma-separated value) file directly from Google. You can do this by logging in to your Google account at contacts.google.com and then clicking on the “menu” button (which looks like three horizontal lines) and selecting “Export.”
By default, this will export all of your contacts. If you only want to export certain contacts, head back to the main list and select which contacts you want to export, and then head back to the Export page. Leave the format as “Google CSV” and click “Export” to download the CSV file.
Head back to mail.protonmail.com and log in, and then click on the “Contacts” button at the top of the screen.
From here, you can click on “Import,” and then drag your .CSV file into the window to upload your contacts. You might want to spend some time on the Contacts page tidying up entries after you’ve completed this process.
Don’t see the option to import via CSV? Log in at contacts.protonmail.com and then click on “Settings,” followed by “Import.” You can then use the “Import Contacts” button to locate the CSV file and upload your contacts here. If you are using ProtonMail V4 or later, you’ll need to use this method.
Forward Incoming Gmail Messages to ProtonMail
With your inbox and contacts successfully imported, you will likely want to make sure that any mail going to your old address is forwarded to your new one. If this isn’t the case (for example, if you are “starting fresh” due to too much incoming mail at your old address), then you can skip this step.
To forward mail from your Gmail account, log in at mail.google.com and click on the “Settings” cog at the top of the page, followed by “See all settings.” Under the “Forwarding and POP/IMAP” tab, click “Add a forwarding address” and enter your new (ProtonMail) address.
Click “Next” and then “Proceed” to finalize your decision. Head back to your ProtonMail account, where you should find a confirmation email from Google. You’ll need to click the link in this email to complete the process.
Refresh your Gmail account one last time and head back to Settings > Forwarding and POP/IMAP. Then select “Forward a copy of incoming mail” and specify the ProtonMail address you just added. Hit “Save Changes” at the bottom of the screen and you’re done.
The Finishing Touches
With your inbox transferred, mail forwarded, and contacts ready to go, it’s time to start using your new email address. There are a few things that you should remember to do to ensure that you can complete the migration:
- Update your online accounts to reflect your email address changes (social media, online shopping, utilities, health care, and so on).
- Notify your contacts of your new address. You should use the “BCC” field to send mail to multiple contacts without sharing the full list of recipients.
- Download the ProtonMail mobile app for Android or iPhone so that you can access your email on the go.
- If you’re a premium ProtonMail user, you can download ProtonMail Bridge, which allows ProtonMail to work with mail clients like Outlook, Thunderbird, and Apple Mail.


