Update Ubuntu Mate OS
$ sudo apt-get update && sudo apt-get upgrade
Install The VNC4Server Into Your Ubuntu Mate OS
This step is the easiest, simply respond yes to any questions that arise, and the process will complete itself automatically.
$ sudo apt-get install vnc4server
Startup The VNC4Server, Then Kill It
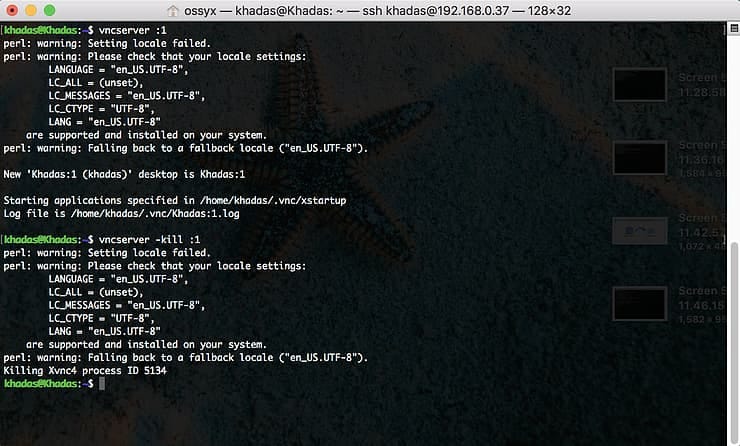
We need to start the VNC server so that we can figure out where it’s configuration files are stored. After that we need to kill it, so that we can modify the configuration file.
$ vncserver :1

$ vncserver -kill :1
Let’s explain some things for the beginners, vncserver is the shell command to launch a new VNC daemon in Ubuntu Mate. -kill is the <argument> used when you need to kill the daemon. Finally, :1 is the network <port> on which you want to run the daemon on.
For example, if you want to run two VNC daemons simultaneously, type vnc server :1 && vncserver :2 into the terminal. You can then connect to them on ports 5901 and 5902 respectively. If you need to kill them both, type vncserver -kill :1 && vncserver -kill :2&& is just the command used when you want to run two shell commands on the same line.
Edit your VNC4Server’s Configuration File
Now we need to edit your config file so that when you login to your Ubuntu-Machine via VNC, it will start up the graphical user interface. By default it does not!
You can find the configuration file’s directory, when you previously issued the command vncserver :1. You will find it on the line that says “Starting applications specified in …”.
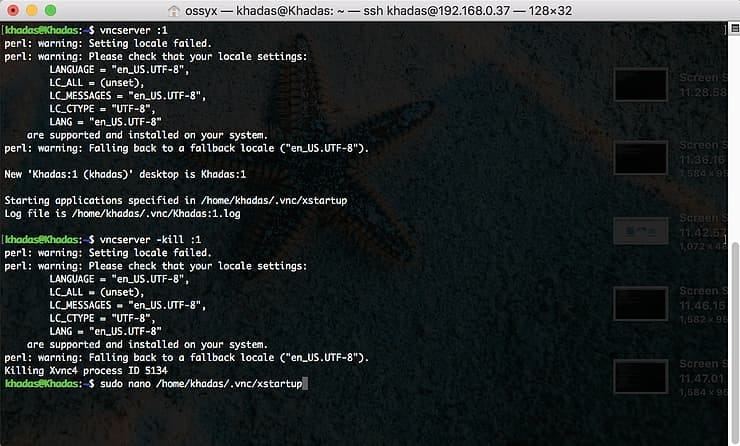
Now that you know where the configuration file is…you can then issue the command to edit the configuration file. sudo is the command given to execute your command as root. If you do not have sufficient privileges to do something, just add sudo in front.
$ sudo nano /home/khadas/.vnc/xstartup
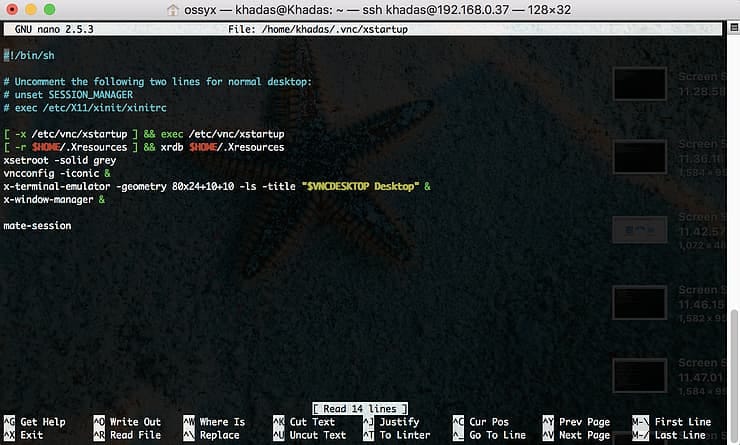
…move the cursor to the bottom of the file, using the arrow keys on your keyboard, then type in…
mate-session
..press the following keys on your keyboard…[ Control-X ][ y ][ Enter ]
If you did all the above correctly, and in the correct sequence, you would have saved your configuration file with the line mate-session at the bottom! mate-session is the command for starting up Ubuntu Mate’s graphical user interface (GUI).
Ensure Your VNC4Server Starts On Ubuntu Mate Boot Up
This step is very important, if you don’t do this, you will not be able to reconnect to your Ubuntu-Machine via VNC if it is rebooted, or loses power.
$ crontab -e
…move the cursor to the bottom of the file, using the arrow keys on your keyboard, then type in…@reboot /usr/bin/vncserver :1
You can also add additional VNC daemons to run on startup by adding additional lines such as:
…this step is OPTIONAL…@reboot /usr/bin/vncserver :2 #port 5902 @reboot /usr/bin/vncserver :3 #port 5903
Once you’re done, use your keyboard to exit the text editor.
…press the following keys on your keyboard…
[ Control-X ]
[ y ]
[ Enter ]
Start the VNC4Server Daemon
$ vncserver :1
You can check if the server is listening on port 5901 by using netstat. You should see a TCP6 Protocol, running on port 5901. That port should be in a LISTEN state, which means that it is listening for inbound connections.
…this step is OPTIONAL…
$ netstat -a
Connect To Your Ubuntu-Machine By VNC Client
This is the fun part that we’ve all been waiting for…actually connecting to our Ubuntu-Machine via VNC, so we get the full desktop experience! First you’ll need to download the RealVNC Client.
If you’re on iOS, you can also download their iOS app.
On your Mac, run the RealVNC app, and type in your VIM’s ip-address, followed by the port that your VNC daemon is running on. In my case it’s
192.168.0.37:1
…inside the RealVNC desktop app… x.x.x.x:1
If your VNC daemon is running on another port such as 5902, then type:
…change the number, depending on the port you chose… x.x.x.x:2
Alternative: NoMachine
Herunterladen (wichtig für Raspberry Pie: ARM V7 – DEB)
https://www.nomachine.com/de/download/download&id=110&s=ARM
cd ~/Downloads
sudo dpkg -i nomachine_6.7.6_3_armhf.deb
(Der Dateiname bzw. die Version 6.7.6 kann abweichen)


