
Das Master-Plugin für Snippets in der function.php der WordPress-Theme: Code-Snippets
Code Snippets ist eine einfache, klare und übersichtliche Methode, um deiner Website PHP Code Snippets hinzuzufügen. Es ist nicht mehr nötig, eigene Snippets zur Datei functions.php deines Theme hinzuzufügen.
Ein Snippet ist ein kleiner Teil PHP-Code, den du nutzen kannst, um die Funktionalität deiner Website zu erweitern; im Wesentlichen ein Mini-Plugin mit einer geringeren Belastung für deine Website. Die meisten Websites, die Snippets hosten, empfehlen dir, den Snippet-Code in der Dateifunctions.php hinzuzufügen, was nach einiger Zeit recht lang und unübersichtlich werden kann. Code Snippets ändert das, in dem es dir eine grafische Benutzeroberfläche zur Verfügung stellt, in dem du Snippets hinzufügen und eigentlich auch auf deiner Website ausführen kannst, ganz so als ob sie in der Datei functions.php deines Themes wären.
Code Snippets bietet eine grafische Benutzeroberfläche, ähnlich dem Plugins-Menü, zur Verwaltung von Snippets. Snippets können, einfach so wie Plugins, aktiviert und deaktiviert werden. Der Snippet Editor beinhaltet Felder für den Namen, einen visuellen Editor für eine Beschreibung, Tags um Snippets zu kategorisieren und einen vollfunktionalen Code-Editor. Snippets können für die Übertragung auf eine andere Website exportiert werden, entweder als JSON für den späteren Import mit den Code Snippets-Plugin oder als PHP, um dein eigenes Plugin oder Theme zu erstellen.
Löschen Sie die WordPress-Versionsnummer
Es ist ratsam, immer die neueste Version von WordPress zu verwenden. Trotzdem möchten Sie möglicherweise immer noch die WordPress-Versionsnummer von Ihrer Site entfernen. Fügen Sie dazu diesen Codeausschnitt zu Ihrer Funktionsdatei hinzu.
function wpb_remove_version() {
return '';
}
add_filter('the_generator', 'wpb_remove_version');
http:// auf https:// umleiten
You can use the following filter to modify your canonical URLs to use HTTPS:
add_filter( 'rank_math/frontend/canonical', function( $canonical ) { $canonical = preg_replace( '/^https:/i', 'http:', $canonical ); return $canonical; });
Update post date to modified date automatically
I would like to find a function that will automatically change a posts date to the modified post date.
I’m using wp User front end plugin so that visitors can add and edit a custom post. I’m also using the Post expirator plugin so that their post will automatically be set to draft after 1 month. The user will then be emailed and asked to update their post for it to go back on line. The problem is that the plugin only sees the post date. So once a user logs back in and edits their post (using front end user) the expirator date isn’t reset to be 1 month from the modified date, instead it still uses the original date. Hope that all makes sense. So my choices are to either try and write my own function to handle the post expiration based on the modified date or to try and force the posts date to change to the same as the modified date once it has been updated.
function reset_post_date_wpse_121565($data,$postarr) {
  // var_dump($data,$postarr); die; // debug
  $data['post_date'] = $data['post_modified'];
  $data['post_date_gmt'] = $data['post_modified_gmt'];
  return $data;
}
add_filter('wp_insert_post_data','reset_post_date_wpse_121565',99,2);
I answer with hesitation though. As in my comment, if you are using dates in your permalinks you will generate broken links every time that post_date changes.
The real problem in your case seems to be the design of the „expirator“ plugin which would mean that the proper solution might be to redesign that plugin, or find a filter that it provides, instead of altering something like the post date (which has consequences).
Zusätzliche Image-Sizes (für Oxygen Media) ähnlich Gumlet
add_theme_support( 'post-thumbnails' );
add_image_size( 'image-480', 480, 9999 );
add_image_size( 'image-640', 640, 9999 );
add_image_size( 'image-720', 720, 9999 );
add_image_size( 'image-960', 960, 9999 );
add_image_size( 'image-1168', 1168, 9999 );
add_image_size( 'image-1440', 1440, 9999 );
add_image_size( 'image-1920', 1920, 9999 );
Bilder immer zur Mediadatei verlinken
// make galleries link to Media File function make_galleries_link_to_file() { $post_type_object = get_post_type_object( 'post' ); $post_type_object->template = array( array( 'core/gallery', array( 'linkTo' => 'media', ) ), ); } add_action( 'init', 'make_galleries_link_to_file' );Automatische Verlinkung in User-Kommentaren verhindern
Jede in die Kommentare eingefügte URL wird von WordPress automatisch mit einem Link umgeben. Das kann durchaus zu einem Problem werden, denn nicht immer sind es diese Links auch wert, von deinem Blog verlinkt zu werden. Das folgende Snippet macht aus den URLs reinen Text.
<?php
remove_filter('comment_text', 'make_clickable', 9);
Kommentare verhindern
Mit dem Snippet deaktiviert ihr zunächst einmal alle Kommentare in WordPress und schaltet den Support für selbige mehr oder minder ab. Außerdem sollten vorhandene Kommentare in WordPress nun ausgeblendet werden, genau wie die Menüs im Admin, welche sich normalerweise in der Sidebar und der Admin Bar befinden. Damit ist von Kommentaren in WordPress nichts mehr zu sehen, weder im Admin, noch im Frontend des jeweiligen Blogs. Die Kommentare von WordPress sind so also vollständig deaktiviert. Mit dem anschließendem Löschen der comments.php in eurem Theme-Ordner und dem Entfernen der entsprechenden Zeile aus eurem Theme selbst, sind die Kommentare, damit komplett und von Hand abgeschaltet worden. Eigentlich recht einfach, performanter als eine zusätzliche Erweiterung zu aktivieren und vor allem sauberer, weil auch direkt im Theme alle Spuren beseitigt werden.
function disable_comments_status()
	{
	return false;
	}
add_filter('comments_open', 'disable_comments_status', 20, 2);
add_filter('pings_open', 'disable_comments_status', 20, 2);
function disable_comments_post_types_support()
	{
	$post_types = get_post_types();
	foreach($post_types as $post_type)
		{
		if (post_type_supports($post_type, 'comments'))
			{
			remove_post_type_support($post_type, 'comments');
			remove_post_type_support($post_type, 'trackbacks');
			}
		}
	}
add_action('admin_init', 'disable_comments_post_types_support');
function disable_comments_hide_existing_comments($comments)
	{
	$comments = array();
	return $comments;
	}
add_filter('comments_array', 'disable_comments_hide_existing_comments', 10, 2);
function disable_comments_admin_menu()
	{
	remove_menu_page('edit-comments.php');
	}
add_action('admin_menu', 'disable_comments_admin_menu');
function disable_menus_admin_bar_render()
	{
	global $wp_admin_bar;
	$wp_admin_bar->remove_menu('comments');
	}
add_action('wp_before_admin_bar_render', 'disable_menus_admin_bar_render');
Automatische Verlinkung zur Mediendatei
In WordPress gibt es verschiedene Möglichkeiten, Mediendateien (wie Bilder) automatisch zur Mediendatei selbst zu verlinken, anstatt zur Anhangsseite oder gar nicht.
function wpb_autolink_images($content) {
$content = preg_replace_callback('/<img (.+?)>/', 'wpb_autolink_images_callback', $content);
return $content;
}
function wpb_autolink_images_callback($matches) {
$attributes = $matches[1];
if (strpos($attributes, 'wp-image-') !== false) {
$pattern = '/src="(.+?)"/';
preg_match($pattern, $attributes, $url_matches);
$url = $url_matches[1];
return '<a href="' . $url . '"><img ' . $attributes . ' /></a>';
} else {
return '<img ' . $attributes . ' />';
}
}
add_filter('the_content', 'wpb_autolink_images');
WordPress Version 5.8 – Unendliches Laden in der Mediathek reaktivieren
/*================================================ * Unendliches Laden Mediathek aktivieren *===============================================*/ add_filter( 'media_library_infinite_scrolling', '__return_true' ); |
Email Antispambot
function email_encode_function( $atts, $content ){ return '<a href="'.antispambot("mailto:".$content).'">'.antispambot($content).'</a>';}add_shortcode( 'email', 'email_encode_function' );You can use the following shortcode with your email address to encode it in your posts.
[email]youremail@example.com[/email] |
Alternative: Das WordPress-Plugin Email Encoder
Eine sitemap.xml ohne Plugin erstellen
Die sitemap.xml sorgt in Verbindung mit der Google Search Console (ehemals Webmaster Tools) für eine schnelle Indexierung der Beiträge deiner Website. Bisher musstest du ein Plugin installieren, um eine sitemap.xml zu generieren. Mit diesem Code kannst du dir das Plugin sparen.
Die Sitemap wird für deine Beiträge, die Seiten und die Bilder der Mediathek erstellt.
<?php
// Ab hier kopieren
/**
 * Eine eigene sitemap.xml ohne Plugin erstellen
 * @author Andreas Hecht
 */
function ah_create_sitemap() {
  $sitemap_posts = get_posts(array(
    'numberposts' => -1,
    'orderby' => 'modified',
    'post_type'  => array('post','page', 'attachment'), // Deine Custom Post Types hier einfügen (z.B. Portfolio)
    'order'    => 'DESC'
  ));
  $sitemap = '<?xml version="1.0" encoding="UTF-8"?>';
  $sitemap .= '<urlset xmlns="http://www.sitemaps.org/schemas/sitemap/0.9">';
  foreach($sitemap_posts as $post) {
    setup_postdata($post);
    $postdate = explode(" ", $post->post_modified);
    $sitemap .= '<url>'.

      '<loc>'. get_permalink($post->ID) .'</loc>'.

      '<lastmod>'. $postdate[0] .'</lastmod>'.

      '<changefreq>monthly</changefreq>'.

    '</url>';
  }
  $sitemap .= '</urlset>';
  $fp = fopen(ABSPATH . "sitemap.xml", 'w');
  fwrite($fp, $sitemap);
  fclose($fp);
}
add_action('publish_post', 'ah_create_sitemap');
add_action('publish_page', 'ah_create_sitemap');
Pagespeed: Bei statischen URLs keine Query Strings verwenden
Die meisten Proxy Server haben Probleme beim Cachen von URLs, die ein “?” beinhalten. Dies betrifft vor allem .JS- und CSS-Dateien, wie beispielsweise die standardmäßig eingebundene JQuery-Datei:
wp-includes/js/jquery/jquery.js?ver=1.11.0
Umschreiben kann man die URLs durch folgende Code-Zeilen in der functions.php.
function _remove_query_string( $src ){
$parts = explode( '?ver', $src );
  return $parts[0];
}
add_filter( 'style_loader_src', '_remove_query_string', 9999 );
add_filter( 'script_loader_src', '_remove_query_string', 9999 );
Fügen Sie Ihrem WordPress Ihr eigenes Logo hinzu
Möchten Sie Ihren WordPress-Administrationsbereich mit einem White-Label versehen? Das Hinzufügen eines eigenen Logos ist der erste Schritt in diesem Prozess. Zuerst müssen Sie Ihr benutzerdefiniertes Logo als custom-logo.png in den Bildordner Ihres Themas hochladen. Stellen Sie sicher, dass Ihr benutzerdefiniertes Logo 16 × 16 Pixel groß ist. Sie können diesen Code dann zur Funktionsdatei Ihres Themas hinzufügen.
function wpb_custom_logo() {
echo '
<style type="text/css">
#wpadminbar #wp-admin-bar-wp-logo > .ab-item .ab-icon:before {
background-image: url(' . get_bloginfo('stylesheet_directory') . '/images/custom-logo.png) !important;
background-position: 0 0;
color:rgba(0, 0, 0, 0);
}
#wpadminbar #wp-admin-bar-wp-logo.hover > .ab-item .ab-icon {
background-position: 0 0;
}
</style>
';
}
//hook into the administrative header output
add_action('wp_before_admin_bar_render', 'wpb_custom_logo');
Ändern Sie die Fußzeile im WordPress Admin Panel

In der Fußzeile im WordPress-Admin-Bereich wird die Meldung „Danke, dass Sie WordPress verwendet haben“ angezeigt. Sie können daraus alles machen, was Sie wollen, indem Sie diesen Code hinzufügen.
function remove_footer_admin () {

echo 'Fueled by <a href="http://www.wordpress.org" target="_blank">WordPress</a>
 | WP Tutorials: <a href="https://www.webstick.nl" target="_blank">WP</a></p>';

}

add_filter('admin_footer_text', 'remove_footer_admin');
WordPress 5.8 Gutenberg Widgets deaktivieren
/*================================================ * WordPress 5.8 Widget Gutenberg System deaktivieren *===============================================*/ // Disables the block editor from managing widgets in the Gutenberg plugin. add_filter( 'gutenberg_use_widgets_block_editor', '__return_false' ); // Disables the block editor from managing widgets. add_filter( 'use_widgets_block_editor', '__return_false' ); |
Füge benutzerdefinierte Dashboard-Widgets in WordPress hinzu
Sie haben wahrscheinlich Widgets gesehen, die verschiedene Plugins und Themes im WordPress-Dashboard hinzugefügt haben. Als Theme-Entwickler können Sie Ihren eigenen hinzufügen, indem Sie den folgenden Code einfügen:
add_action('wp_dashboard_setup', 'my_custom_dashboard_widgets');

function my_custom_dashboard_widgets() {
global $wp_meta_boxes;

wp_add_dashboard_widget('custom_help_widget', 'Theme Support', 'custom_dashboard_help');
}

function custom_dashboard_help() {
echo '<p>Welkom bij dit aangepaste blogthema! Contact opnemen met de ontwikkelaar, <a href="mailto:yourusername@gmail.com">klik hier</a>. Klik voor WordPress Tutorials: <a href="https://www.webstick.nl" target="_blank">Webstick</a></p>';
}
Ändere den Standard-Gravatar in WordPress
Hast du den Standard-Avatar von Mystery Man in Blogs gesehen? Sie können es einfach durch Avatare Ihrer eigenen Marke ersetzen. Laden Sie einfach das Bild hoch, das Sie als Standard-Avatar verwenden möchten, und fügen Sie diesen Code Ihrer Funktionsdatei hinzu.
add_filter( 'avatar_defaults', 'wpb_new_gravatar' );
function wpb_new_gravatar ($avatar_defaults) {
$myavatar = 'http://voorbeeld-site.nl/wp-content/uploads/2019/06/wpb-default-gravatar.png';
$avatar_defaults[$myavatar] = "Standaard Gravatar";
return $avatar_defaults;
}
Jetzt können Sie zur Seite Einstellungen »Diskussion gehen und Ihren Standard-Avatar auswählen.
![]()
Dynamisches Copyright-Datum in der WordPress-Fußzeile
Sie können das Copyright-Datum einfach hinzufügen, indem Sie die Fußzeilenvorlage in ihrem Thema bearbeiten. Es wird jedoch nicht angezeigt, wenn ihre Website gestartet wird, und wird sich im nächsten Jahr nicht automatisch ändern. Mit diesem Code können Sie der WordPress-Fußzeile ein dynamisches Copyright-Datum hinzufügen.
function wpb_copyright() {
global $wpdb;
$copyright_dates = $wpdb->get_results("
SELECT
YEAR(min(post_date_gmt)) AS firstdate,
YEAR(max(post_date_gmt)) AS lastdate
FROM
$wpdb->posts
WHERE
post_status = 'publish'
");
$output = '';
if($copyright_dates) {
$copyright = "© " . $copyright_dates[0]->firstdate;
if($copyright_dates[0]->firstdate != $copyright_dates[0]->lastdate) {
$copyright .= '-' . $copyright_dates[0]->lastdate;
}
$output = $copyright;
}
return $output;
}
Nach dem Hinzufügen dieser Funktion müssen Sie Ihre Datei footer.php öffnen und den folgenden Code hinzufügen, wo immer Sie das dynamische Copyright-Datum anzeigen möchten:
<?php echo wpb_copyright(); ?>Diese Funktion sucht nach dem Datum Ihrer ersten Nachricht und dem Datum Ihrer letzten Nachricht. Es gibt dann die Jahre wieder, wo immer Sie die Position erwähnen.
Better SEO Automatically Remove Short Words From URL (Stop Words)
So how to make post URL short and SEO Friendly in an Automatic way. Yes, Codes.
Method 1
Lets say you like to remove all words which has less than three letters, Such as a, an, or, in etc. Add the following code at the end of your current theme’s functions.php file
add_filter('sanitize_title', 'remove_short_words');
function remove_short_words($slug) {
    if (!is_admin()) return $slug;
    $slug = explode('-', $slug);
    foreach ($slug as $k => $word) {
        if (strlen($word) < 3) {
            unset($slug[$k]);
        }
    }
    return implode('-', $slug);
}
If you like to go more aggressive like eliminating all three letter words then just change the line 6 of the above code with desired letter count (increase it by one).
if (strlen($word) < 4) {Method 2
Previously we eliminated words according to its letter count but you can do it more efficiently by adding a dictionary which contains list of words to eliminate from URL. Add the following code to functions.php file as you did earlier
add_filter('sanitize_title', 'remove_false_words');
function remove_false_words($slug) {
if (!is_admin()) return $slug;
$slug = explode('-', $slug);
foreach ($slug as $k => $word) {
//false words list separated for commas
$keys_false = 'ernst,a,ab,aber,acht,achte,achten,achter,achtes,ag,alle,allein,allem,allen,aller,allerdings,alles,allgemeinen,als,also,am,an,andere,anderen,andern,anders,au,auch,auf,aus,ausser,ausserdem,außer,außerdem,b,bald,bei,beide,beiden,beim,bekannt,bereits,besonders,bin,bis,bisher,bist,c,d,d.h,da,dabei,dadurch,dafür,dagegen,daher,dahin,dahinter,damals,damit,danach,daneben,dank,dann,daran,darauf,daraus,darf,darfst,darin,darum,darunter,darüber,das,dasein,daselbst,dass,dasselbe,davon,davor,dazu,dazwischen,daß,dein,deine,deinem,deiner,dem,dementsprechend,demgegenüber,demgemäss,demgemäß,demselben,demzufolge,den,denen,denn,denselben,der,deren,derjenige,derjenigen,dermassen,dermaßen,derselbe,derselben,des,deshalb,desselben,dessen,deswegen,dich,die,diejenige,diejenigen,dies,diese,dieselbe,dieselben,diesem,diesen,dieser,dieses,dir,doch,dort,drei,drin,dritte,dritten,dritter,drittes,du,durch,durchaus,durfte,durften,dürfen,dürft,e,eben,ebenso,ehrlich,ei,eigen,eigene,eigenen,eigener,eigenes,ein,einander,eine,einem,einen,einer,eines,einige,einigen,einiger,einiges,einmal,eins,elf,en,ende,endlich,entweder,er,erst,es,etwa,etwas,euch,euer,eure,f,folgende,früher,fünf,fünfte,fünften,fünfter,fünftes,für,g,gab,ganz,ganze,ganzen,ganzer,ganzes,gar,gedurft,gegen,gegenüber,gehabt,gehen,geht,gekannt,gekonnt,gemacht,gemocht,gemusst,genug,gerade,gern,gesagt,geschweige,gewesen,gewollt,geworden,gibt,ging,gleich,gross,grosse,grossen,grosser,grosses,groß,große,großen,großer,großes,gut,gute,guter,gutes,h,habe,haben,habt,hast,hat,hatte,hatten,hattest,hattet,heisst,her,heute,hier,hin,hinter,hoch,hätte,hätten,i,ich,ihm,ihn,ihnen,ihr,ihre,ihrem,ihren,ihrer,ihres,im,immer,in,indem,infolgedessen,ins,irgend,ist,j,ja,je,jede,jedem,jeden,jeder,jedermann,jedermanns,jedes,jedoch,jemand,jemandem,jemanden,jene,jenem,jenen,jener,jenes,jetzt,k,kam,kann,kannst,kaum,kommen,kommt,konnte,konnten,kurz,können,könnt,könnte,l,lang,lange,leicht,leide,lieber,los,m,machen,macht,machte,mag,magst,mahn,mal,man,manche,manchem,manchen,mancher,manches,mann,mehr,mein,meine,meinem,meinen,meiner,meines,mich,mir,mit,mittel,mochte,mochten,muss,musst,musste,mussten,muß,mußt,möchte,mögen,möglich,mögt,müssen,müsst,müßt,n,na,nach,nachdem,nahm,natürlich,neben,nein,neue,neuen,neun,neunte,neunten,neunter,neuntes,nicht,nichts,nie,niemand,niemandem,niemanden,noch,nun,nur,o,ob,oben,oder,offen,oft,ohne,p,q,r,recht,rechte,rechten,rechter,rechtes,richtig,s,sa,sache,sagt,sagte,sah,satt,schon,sechs,sechste,sechsten,sechster,sechstes,sehr,sei,seid,seien,sein,seine,seinem,seinen,seiner,seines,seit,seitdem,selbst,sich,sie,sieben,siebente,siebenten,siebenter,siebentes,sind,so,solang,solche,solchem,solchen,solcher,solches,soll,sollen,sollst,sollt,sollte,sollten,sondern,sonst,soweit,sowie,später,startseite,statt,steht,t,tat,teil,tel,tritt,trotzdem,tun,u,um,und,und?,uns,unser,unsere,unserer,unter,v,vergangenen,viel,viele,vielem,vielen,vielleicht,vier,vierte,vierten,vierter,viertes,vom,von,vor,w,wahr?,wann,war,waren,wart,warum,was,wegen,weil,weit,weiter,weitere,weiteren,weiteres,welche,welchem,welchen,welcher,welches,wem,wen,wenig,wenige,weniger,weniges,wenigstens,wenn,wer,werde,werden,werdet,weshalb,wessen,wie,wieder,wieso,will,willst,wir,wird,wirklich,wirst,wissen,wo,wohl,wollen,wollt,wollte,wollten,worden,wurde,wurden,während,währenddem,währenddessen,wäre,würde,würden,x,y,z,z.b,zehn,zehnte,zehnten,zehnter,zehntes,zeit,zu,zuerst,zugleich,zum,zunächst,zur,zurück,zusammen,zwanzig,zwar,zwei,zweite,zweiten,zweiter,zweites,zwischen,zwölf,über,überhaupt,übrigens,fuer,&#x2705;,&#9989;,&#x2764;&#xfe0f;,&#10084;&#65039;,,ツ,ueber';
$keys = explode(',', $keys_false);
foreach ($keys as $l => $wordfalse) {
if ($word==$wordfalse) {
unset($slug[$k]);
}
}
}
return implode('-', $slug);
}In line 7 of the above code you can find the list of words which are blacklisted. You can add more words by separating each words with comma. For example lets add words like and and in to the list
$keys_false = 'a,about,above,across,after,again,against,all,almost,alone,along,already,also,and,in';
This method is bit safest and efficient because words like “against”, “already” contains more than five letters and if you decide to eliminate all five letter words then you may end up eliminating keywords also. Its little pain in the ass to add those words but its worth the pain.
Ändern Sie die Hintergrundfarbe in WordPress nach dem Zufallsprinzip
Möchten Sie die Hintergrundfarbe Ihres WordPress bei jedem Besuch zufällig ändern und die Seite neu laden? Hier erfahren Sie, wie Sie dies einfach tun können. Zuerst müssen Sie diesen Code zur Datei functions.php Ihres Themas hinzufügen.
function wpb_bg() {
$rand = array('0', '1', '2', '3', '4', '5', '6', '7', '8', '9', 'a', 'b', 'c', 'd', 'e', 'f');
$color ='#'.$rand[rand(0,15)].$rand[rand(0,15)].$rand[rand(0,15)].
$rand[rand(0,15)].$rand[rand(0,15)].$rand[rand(0,15)];
echo $color;
}
Als nächstes müssen Sie die Datei header.php in Ihrem Thema bearbeiten. Suchen Sie das <body> -Tag und ersetzen Sie es durch diese Zeile:
<body <?php body_class(); ?> style="background-color:<?php wpb_bg();?>">>Sie können jetzt Ihre Änderungen speichern und Ihre Website besuchen, um dies in Aktion zu sehen.

Aktualisieren Sie die WordPress-URLs
Wenn Ihre WordPress-Anmeldeseite ständig aktualisiert wird oder Sie keinen Zugriff auf den Administrationsbereich haben, müssen Sie die WordPress-URLs aktualisieren. Eine Möglichkeit, dies zu tun, besteht darin, die Datei wp-config.php zu verwenden . In diesem Fall können Sie jedoch auf der Einstellungsseite nicht die richtige Adresse festlegen. Die Felder WordPress-URL und Site-URL sind gesperrt und können nicht bearbeitet werden. Um dies zu beheben, müssen Sie diesen Code zu Ihrer Funktionsdatei hinzufügen. (Sie können die URLs auch direkt in der Datenbank über MyPHPadmin anpassen.)
update_option( 'siteurl', 'http://voorbeeldsite.nl' );
update_option( 'home', 'http://voorbeeldsite.nl' );
Vergessen Sie nicht, „examplesite.nl“ durch Ihren eigenen Domainnamen zu ersetzen. Gehen Sie nach dem Anmelden zu Einstellungen und legen Sie dort die URLs fest. Danach müssen Sie den Code löschen, den Sie der Jobdatei hinzugefügt haben. Andernfalls werden die URLs bei jedem Öffnen Ihrer Site aktualisiert.
Fügen Sie zusätzliche Bildgrößen in WordPress hinzu
WordPress erstellt automatisch verschiedene Bildgrößen, wenn Sie ein Bild hochladen. Sie können auch zusätzliche Bildgrößen erstellen, die in Ihrem Thema verwendet werden sollen. Fügen Sie diesen Code zur Funktionsdatei Ihres Themas hinzu.
add_image_size( 'sidebar-thumb', 120, 120, true ); // Hard Crop Mode
add_image_size( 'homepage-thumb', 220, 180 ); // Soft Crop Mode
add_image_size( 'singlepost-thumb', 590, 9999 ); // Unlimited Height Mode
Dieser Code erstellt drei neue Bildgrößen mit unterschiedlichen Größen. Sie können den Code jederzeit an Ihre eigenen Anforderungen anpassen. Mit diesem Code können Sie eine beliebige Bildgröße an einer beliebigen Stelle in Ihrem Thema anzeigen.
<?php the_post_thumbnail( 'homepage-thumb' ); ?>Fügen Sie Ihrem Thema neue Navigationsmenüs hinzu
Entwickler von WordPress-Themes können Navigationsmenüs definieren und diese dann anzeigen. Fügen Sie diesen Code zur Funktionsdatei Ihres Themas hinzu, um eine neue Menüposition in Ihrem Thema zu definieren.
function wpb_custom_new_menu() {
  register_nav_menu('mijn-persoonlijke-menu',__( 'Mijn persoonlijke menu' ));
}
add_action( 'init', 'wpb_custom_new_menu' );
Sie können jetzt zu Darstellung »Menüs gehen und sehen ‚Mein persönliches Menü‘ als Option für den Themenort.

Sie müssen diesen Code zu Ihrem Thema hinzufügen, in dem das Navigationsmenü angezeigt werden soll:
<?php
wp_nav_menu( array(
    'theme_location' => 'my-custom-menu',
    'container_class' => 'custom-menu-class' ) );
?>
Fügen Sie Profilfelder für Autoren hinzu
Möchten Sie Ihren Autorenprofilen in WordPress zusätzliche Felder hinzufügen? Sie können dies einfach tun, indem Sie diesen Code zu Ihrer Funktionsdatei hinzufügen:
function wpb_new_contactmethods( $contactmethods ) {
// Add Twitter
$contactmethods['twitter'] = 'Twitter';
//add Facebook
$contactmethods['facebook'] = 'Facebook';

return $contactmethods;
}
add_filter('user_contactmethods','wpb_new_contactmethods',10,1);
Dieser Code fügt Benutzerprofile in WordPress Twitter- und Facebook-Felder hinzu.

Sie können diese Felder jetzt in Ihrer Autorenvorlage wie folgt anzeigen:
<?php echo $curauth->twitter; ?>Fügen Sie vorgefertigte Widget-Bereiche oder Seitenleisten in WordPress-Designs hinzu
Premium-Designs bieten eine viel einfachere Möglichkeit, Seitenleisten zu erstellen. Dies ist einer der am häufigsten verwendeten und viele Entwickler wissen dies bereits. Aber es verdient, in dieser Liste für diejenigen zu sein, die neu darin sind. Fügen Sie den folgenden Code in Ihre Datei functions.php ein:
// Register Sidebars
function custom_sidebars() {

    $args = array(
        'id'            => 'custom_sidebar',
        'name'          => __( 'Custom Widget Area', 'text_domain' ),
        'description'   => __( 'A custom widget area', 'text_domain' ),
        'before_title'  => '<h3 class="widget-title">',
        'after_title'   => '</h3>',
        'before_widget' => '<aside id="%1$s" class="widget %2$s">',
        'after_widget'  => '</aside>',
    );
    register_sidebar( $args );

}
add_action( 'widgets_init', 'custom_sidebars' );
Sie können jetzt im Backend zu Darstellung »Widgets gehen und sehen Ihren neuen benutzerdefinierten Widget-Bereich.

Fügen Sie diesen Code hinzu, um diesen Widget-Bereich oder diese Seitenleiste in Ihrem Thema anzuzeigen:
<?php if ( !function_exists('dynamic_sidebar') || !dynamic_sidebar('custom_sidebar') ) : ?>
<!–Default sidebar info goes here–>
<?php endif; ?>
Anmeldefehler in WordPress ausblenden
Anmeldefehler in WordPress können von Hackern verwendet werden, um zu erraten, ob sie den falschen Benutzernamen oder das falsche Passwort eingegeben haben. Indem Sie Anmeldefehler in WordPress ausblenden, können Sie Ihren Anmeldebereich etwas sicherer machen.
function no_wordpress_errors(){
  return 'Something is wrong!';
}
add_filter( 'login_errors', 'no_wordpress_errors' );
Jetzt sehen Benutzer eine Standardnachricht, wenn sie einen falschen Benutzernamen oder ein falsches Passwort eingeben.

Deaktivieren Sie die Anmeldung in WordPress mit der E-Mail-Adresse
WordPress bietet Benutzern die Möglichkeit, sich mit Benutzername oder E-Mail-Adresse anzumelden. Sie können die E-Mail-Anmeldung in WordPress einfach deaktivieren, indem Sie diesen Code zu Ihrer functions.php hinzufügen.
remove_filter( 'authenticate', 'wp_authenticate_email_password', 20 );Deaktivieren Sie die Suche in WordPress
Wenn Sie die Suchfunktion auf Ihrer WordPress-Site deaktivieren möchten, fügen Sie diesen Code einfach Ihrer Funktionsdatei hinzu.
function fb_filter_query( $query, $error = true ) {
if ( is_search() ) {
$query->is_search = false;
$query->query_vars[s] = false;
$query->query[s] = false;

// to error
if ( $error == true )
$query->is_404 = true;
}
}

add_action( 'parse_query', 'fb_filter_query' );
add_filter( 'get_search_form', create_function( '$a', "return null;" ) );
Ändern Sie den Read More-Text für Auszüge in WordPress
Möchten Sie den Text ändern, der nach dem Auszug angezeigt wird? Fügen Sie diesen Code zur Datei functions.php Ihres Themas hinzu.
// Replaces the excerpt "Read More" text by a link
function new_excerpt_more($more) {
       global $post;
	return '<a class="moretag" href="'. get_permalink($post->ID) . '"> Read the full article...</a>';
}
add_filter('excerpt_more', 'new_excerpt_more');
Deaktivieren Sie RSS-Feeds in WordPress
Nicht alle Websites benötigen RSS-Feeds. Wenn Sie RSS-Feeds auf Ihrer WordPress-Site deaktivieren möchten, fügen Sie diesen Code zur Funktionsdatei Ihres Themas hinzu.
function fb_disable_feed() {
wp_die( __('No feed available,please visit our <a href="'. get_bloginfo('url') .'">homepage</a>!') );
}

add_action('do_feed', 'fb_disable_feed', 1);
add_action('do_feed_rdf', 'fb_disable_feed', 1);
add_action('do_feed_rss', 'fb_disable_feed', 1);
add_action('do_feed_rss2', 'fb_disable_feed', 1);
add_action('do_feed_atom', 'fb_disable_feed', 1);
Ändern Sie die Auszugslänge in WordPress
WordPress begrenzt die Länge des Auszugs auf 55 Wörter. Wenn Sie dies ändern möchten, können Sie diesen Code zu Ihrer Funktionsdatei hinzufügen. Ändern Sie die Zahl 100 in die Anzahl der Wörter, die Sie in den Auszügen anzeigen möchten.
function new_excerpt_length($length) {
return 100;
}
add_filter('excerpt_length', 'new_excerpt_length');
Fügen Sie einen Administrator in WordPress hinzu
Wenn Sie Ihr WordPress-Passwort und Ihre E-Mail-Adresse vergessen haben, können Sie einen Administrator hinzufügen, indem Sie diesen Code mithilfe eines FTP-Clients oder eines Hosting-Panels zur Datei functions.php Ihres Themas hinzufügen.
function wpb_admin_account(){
$user = 'Username';
$pass = 'Password';
$email = 'email@domain.com';
if ( !username_exists( $user )  && !email_exists( $email ) ) {
$user_id = wp_create_user( $user, $pass, $email );
$user = new WP_User( $user_id );
$user->set_role( 'administrator' );
} }
add_action('init','wpb_admin_account');
Vergessen Sie nicht, die Felder für Benutzername, Passwort und E-Mail auszufüllen. Vergessen Sie nach dem Anmelden bei Ihrer WordPress-Site nicht, den Code aus Ihrer Jobdatei zu entfernen.
Entfernen Sie das Begrüßungsfenster aus dem WordPress-Dashboard

Der Begrüßungsbildschirm ist eine Meta-Box, die dem Dashboard des WordPress-Administrationsbereichs hinzugefügt wurde. Es bietet nützliche Verknüpfungen für Anfänger, um Dinge auf ihrer neuen WordPress-Site zu tun. Sie können sich leicht verstecken, indem Sie den folgenden Code zu Ihrer Funktionsdatei hinzufügen.
remove_action('welcome_panel', 'wp_welcome_panel');Zeigt die Gesamtzahl der registrierten Benutzer in WordPress an
Möchten Sie die Gesamtzahl der registrierten Benutzer auf Ihrer WordPress-Site anzeigen? Fügen Sie diesen Code einfach der Datei functions.php Ihres Themas hinzu.
// Function to return user count
function wpb_user_count() {
$usercount = count_users();
$result = $usercount['total_users'];
return $result;
}
// Creating a shortcode to display user count
add_shortcode('user_count', 'wpb_user_count');
Dieser Code erstellt einen Shortcode, mit dem Sie die Gesamtzahl der registrierten Benutzer auf Ihrer Site anzeigen können. Jetzt müssen Sie nur noch diesen Shortcode zu [user_count] Ihrem Beitrag oder Ihrer Seite hinzufügen, auf der Sie die Gesamtzahl der Benutzer anzeigen möchten.
Aktivieren Sie Shortcodes in Text-Widgets
Standardmäßig führt WordPress keine Shortcodes in Text-Widgets aus. Um dies zu beheben, müssen Sie diesen Code zur Funktionsdatei Ihres Themas hinzufügen.
// Enable shortcodes in text widgets
add_filter('widget_text','do_shortcode');
Fügen Sie WordPress-Posts ungerade und gerade CSS-Klassen hinzu
Möglicherweise haben Sie WordPress-Themes mit einer ungeraden oder geraden Klasse für WordPress-Kommentare gesehen. Es hilft Benutzern zu visualisieren, wo ein Kommentar endet und der nächste beginnt. Sie können dieselbe Technik für Ihre WordPress-Beiträge verwenden. Es sieht ästhetisch ansprechend aus und hilft Benutzern, Seiten mit viel Inhalt schnell zu scannen. Fügen Sie diesen Code einfach der Datei functions.php Ihres Themas hinzu.
function oddeven_post_class ( $classes ) {
   global $current_class;
   $classes[] = $current_class;
   $current_class = ($current_class == 'odd') ? 'even' : 'odd';
   return $classes;
}
add_filter ( 'post_class' , 'oddeven_post_class' );
global $current_class;
$current_class = 'odd';
Dieser Code fügt WordPress-Posts eine ungerade oder gerade Klasse hinzu. Sie können jetzt benutzerdefiniertes CSS hinzufügen, um sie anders zu gestalten. Hier ist ein Beispielcode, um Ihnen den Einstieg zu erleichtern.
.even {
background:#f0f8ff;
}
.odd {
 background:#f4f4fb;
}
Das Ergebnis wird so aussehen.

Fügen Sie zusätzliche Dateitypen zum Hochladen in WordPress hinzu
Standardmäßig können Sie mit WordPress eine begrenzte Anzahl der am häufigsten verwendeten Dateitypen hochladen. Sie können es jedoch erweitern, um andere Dateitypen zuzulassen. Fügen Sie diesen Code zur Funktionsdatei Ihres Themas hinzu:
function my_myme_types($mime_types){
    $mime_types['svg'] = 'image/svg+xml'; //Adding svg extension
    $mime_types['psd'] = 'image/vnd.adobe.photoshop'; //Adding photoshop files
    return $mime_types;
}
add_filter('upload_mimes', 'my_myme_types', 1, 1);
Mit diesem Code können Sie SVG- und PSD-Dateien in WordPress hochladen. Sie müssen Google nachschlagen, um die MIME-Typen für die Dateitypen herauszufinden, die Sie zulassen möchten, und sie dann im Code verwenden.
Entfernen Sie Bildlinks standardmäßig in WordPress
Wenn Sie ein Bild in WordPress hochladen, wird es standardmäßig mit der Bilddatei oder der Anhangsseite verknüpft. Wenn Benutzer auf das Bild klicken, werden sie zu einer neuen Seite außerhalb Ihres Beitrags weitergeleitet. So können Sie WordPress ganz einfach daran hindern, Bild-Uploads automatisch zu verknüpfen. Alles, was Sie tun müssen, ist, diesen Codeausschnitt zu Ihrer Funktionsdatei hinzuzufügen:
function wpb_imagelink_setup() {
    $image_set = get_option( 'image_default_link_type' );

    if ($image_set !== 'none') {
        update_option('image_default_link_type', 'none');
    }
}
add_action('admin_init', 'wpb_imagelink_setup', 10);
Wenn Sie jetzt ein neues Bild in WordPress hochladen, wird es nicht automatisch verknüpft. Sie können es weiterhin mit der Datei- oder Anhangsseite verknüpfen, wenn Sie möchten.

Fügen Sie ein Autoreninfo-Feld in WordPress-Posts hinzu
Wenn Sie eine Website mit mehreren Autoren haben und am Ende Ihres Beitrags Autoren-Bios anzeigen möchten, können Sie diese Methode ausprobieren, ohne ein Plugin verwenden zu müssen. Fügen Sie zunächst diesen Code zu Ihrer Funktionsdatei hinzu:
function wpb_author_info_box( $content ) {

global $post;

// Detecteer of het een enkele post is met een postauteur
if ( is_single() && isset( $post->post_author ) ) {

// Haal de weergavenaam van de auteur op
$display_name = get_the_author_meta( 'display_name', $post->post_author );

// Als weergavenaam niet beschikbaar is, gebruikt u bijnaam als weergavenaam
if ( empty( $display_name ) )
$display_name = get_the_author_meta( 'nickname', $post->post_author );

// Verkrijg de biografische informatie of beschrijving van de auteur
$user_description = get_the_author_meta( 'user_description', $post->post_author );

// Krijg auteur's website URL
$user_website = get_the_author_meta('url', $post->post_author);

// Verkrijg de link naar de auteursarchiefpagina
$user_posts = get_author_posts_url( get_the_author_meta( 'ID' , $post->post_author));

if ( ! empty( $display_name ) )

$author_details = '<p class="author_name">About ' . $display_name . '</p>';

if ( ! empty( $user_description ) )
// Auteur avatar and bio

$author_details .= '<p class="author_details">' . get_avatar( get_the_author_meta('user_email') , 90 ) . nl2br( $user_description ). '</p>';

$author_details .= '<p class="author_links"><a href="'. $user_posts .'">Bekijk alle berichten van ' . $display_name . '</a>';

// Controleer of de auteur een website in zijn profiel heeft
if ( ! empty( $user_website ) ) {

// Toon auteurswebsite link
$author_details .= ' | <a href="' . $user_website .'" target="_blank" rel="nofollow">Website</a></p>';

} else {
// als er geen website van de auteur is, sluit dan gewoon de alinea
$author_details .= '</p>';
}

// Geef al deze informatie door aan de bericht inhoud
$content = $content . '<footer class="author_bio_section" >' . $author_details . '</footer>';
}
return $content;
}

// Voeg onze functie toe aan het post-inhoudfilter
add_action( 'the_content', 'wpb_author_info_box' );

// Sta HTML toe in auteur biosectie
remove_filter('pre_user_description', 'wp_filter_kses');
Als Nächstes müssen Sie benutzerdefiniertes CSS hinzufügen, damit es besser aussieht. Sie können dieses Beispiel-CSS als Ausgangspunkt verwenden.
.author_bio_section{
background: none repeat scroll 0 0 #F5F5F5;
padding: 15px;
border: 1px solid #ccc;
}

.author_name{
font-size:16px;
font-weight: bold;
}

.author_details img {
border: 1px solid #D8D8D8;
border-radius: 50%;
float: left;
margin: 0 10px 10px 0;
}
Deaktivieren Sie XML-RPC in WordPress
XML-RPC ist eine Methode, mit der externe Apps remote mit Ihrer WordPress-Site kommunizieren können. Dies kann Sicherheitsprobleme verursachen und von Hackern ausgenutzt werden. Fügen Sie diesen Code einfach Ihrer Funktionsdatei hinzu, um XML-RPC in WordPress zu deaktivieren:
add_filter('xmlrpc_enabled', '__return_false');// load jquery from google cdn in wordpress
function enqueue_jquery_google_cdn() {
wp_deregister_script( 'jquery' );
wp_register_script( 'jquery', 'http://ajax.googleapis.com/ajax/libs/jquery/1.11.1/jquery.min.js', false, NULL, true );
wp_enqueue_script( 'jquery' );
}
add_action( 'wp_enqueue_scripts', 'enqueue_jquery_google_cdn' );Schalte das jQuery Migrate Script ab
jQuery Migrate ist ein Script, das für eine Abwärtskompatibilität älterer jQuery-Anwendungen sorgen soll. Die »normale« und moderne jQuery Version unterstützt nicht mehr alle alten Anwendungen. Dieser Fall wird mit Sicherheit nicht mehr als 5% aller WordPress-Websites betreffen, und doch wird das nicht gerade kleine Script standardmäßig von WordPress geladen. So schaltest du es ganz einfach ab:
<?php
/**
* Dequeue jQuery Migrate Script in WordPress.
*/
if ( ! function_exists( 'evolution_remove_jquery_migrate' ) ) :
function evolution_remove_jquery_migrate( &$scripts) {
if(!is_admin()) {
$scripts->remove( 'jquery');
$scripts->add( 'jquery', false, array( 'jquery-core' ), '1.12.4' );
}
}
add_filter( 'wp_default_scripts', 'evolution_remove_jquery_migrate' );
endif;WordPress oEmbed Funktion abschalten
Die WordPress-Version 4.4 brachte die neue Funktion oEmbed mit sich, die in erster Linie dazu gedacht ist, fremde Artikel oder Seiten mittels eines einfachen Links in Beiträge einbetten zu können. Wenn du diese Funktion nicht benötigst oder es dir einfach unwohl dabei ist, dass deine Artikel jederzeit in fremden Artikel dargestellt werden können, dann deaktiviere diese Funktion einfach.
<?php
/**
* Disable embeds on init.
*
* - Removes the needed query vars.
* - Disables oEmbed discovery.
* - Completely removes the related JavaScript.
*
* @since 1.0.0
*/
function evolution_disable_embeds_init() {
/* @var WP $wp */
global $wp;
// Remove the embed query var.
$wp->public_query_vars = array_diff( $wp->public_query_vars, array(
'embed',
) );
// Remove the REST API endpoint.
remove_action( 'rest_api_init', 'wp_oembed_register_route' );
// Turn off oEmbed auto discovery.
add_filter( 'embed_oembed_discover', '__return_false' );
// Don't filter oEmbed results.
remove_filter( 'oembed_dataparse', 'wp_filter_oembed_result', 10 );
// Remove oEmbed discovery links.
remove_action( 'wp_head', 'wp_oembed_add_discovery_links' );
// Remove oEmbed-specific JavaScript from the front-end and back-end.
remove_action( 'wp_head', 'wp_oembed_add_host_js' );
add_filter( 'tiny_mce_plugins', 'evolution_disable_embeds_tiny_mce_plugin' );
// Remove all embeds rewrite rules.
add_filter( 'rewrite_rules_array', 'disable_embeds_rewrites' );
// Remove filter of the oEmbed result before any HTTP requests are made.
remove_filter( 'pre_oembed_result', 'wp_filter_pre_oembed_result', 10 );
}
add_action( 'init', 'evolution_disable_embeds_init', 9999 );
/**
* Removes the 'wpembed' TinyMCE plugin.
*
* @since 1.0.0
*
* @param array $plugins List of TinyMCE plugins.
* @return array The modified list.
*/
function evolution_disable_embeds_tiny_mce_plugin( $plugins ) {
return array_diff( $plugins, array( 'wpembed' ) );
}
/**
* Remove all rewrite rules related to embeds.
*
* @since 1.0.0
*
* @param array $rules WordPress rewrite rules.
* @return array Rewrite rules without embeds rules.
*/
function evolution_disable_embeds_rewrites( $rules ) {
foreach ( $rules as $rule => $rewrite ) {
if ( false !== strpos( $rewrite, 'embed=true' ) ) {
unset( $rules[ $rule ] );
}
}
return $rules;
}
/**
* Remove embeds rewrite rules on plugin activation.
*
* @since 1.0.0
*/
function evolution_disable_embeds_remove_rewrite_rules() {
add_filter( 'rewrite_rules_array', 'disable_embeds_rewrites' );
flush_rewrite_rules( false );
}
register_activation_hook( __FILE__, 'evolution_disable_embeds_remove_rewrite_rules' );
/**
* Flush rewrite rules on plugin deactivation.
*
* @since 1.0.0
*/
function evolution_disable_embeds_flush_rewrite_rules() {
remove_filter( 'rewrite_rules_array', 'disable_embeds_rewrites' );
flush_rewrite_rules( false );
}
register_deactivation_hook( __FILE__, 'evolution_disable_embeds_flush_rewrite_rules' );
Befreie den WordPress-Header von unnötigen Einträgen
WordPress lädt eine Menge Sachen über den wp_head() Hook in den Header der WordPress Themes. Einiges davon ist sehr nützlich, anderes hingegen weniger. Manches bläht die Website einfach nur unnötig auf. Hier kommt ein kleines Snippet, dass mal kräftig aufräumt.
<?php
/**
* Befreit den Header von unnötigen Einträgen
*/
add_action('init', 'evolution_remheadlink');
function evolution_remheadlink()
{
remove_action('wp_head', 'rsd_link');
remove_action('wp_head', 'wp_generator');
remove_action('wp_head', 'index_rel_link');
remove_action('wp_head', 'wlwmanifest_link');
remove_action('wp_head', 'feed_links', 2);
remove_action('wp_head', 'feed_links_extra', 3);
remove_action('wp_head', 'parent_post_rel_link', 10, 0);
remove_action('wp_head', 'start_post_rel_link', 10, 0);
remove_action('wp_head', 'wp_shortlink_wp_head', 10, 0);
remove_action('wp_head', 'wp_shortlink_header', 10, 0);
remove_action('wp_head', 'adjacent_posts_rel_link_wp_head', 10, 0);
}
Eigenes Login-Logo mit eigener Hintergrundfarbe
Du bist so richtig stolz auf deine WordPress-Website und hast viel Arbeit in das Design investiert? Dann gehe noch einen Schritt weiter und passe auch gleich das Logo auf der Login-Seite an. Zusammen mit einer eigenen Hintergrundfarbe sieht das schon richtig gut aus.
<?php
/**
* Ein neues Logo für den Adminbereich und eine eigene Hintergrundfarbe
* @author Andreas Hecht
*/
function ah_login_logo() {
?>
<style type="text/css">
#login h1 a, .login h1 a {
background-image: url(<?php echo get_stylesheet_directory_uri(); ?>/images/dein-logo.png);
margin-bottom: 0;
background-size: 180px;
height: 180px;
width: 180px;
margin-left: auto;
margin-right: auto;
border-radius: 50%;
}
body.login {background-color: #0073bf;} .login #backtoblog a, .login #nav a {color: #fff !important}
</style>
<?php }
add_action( 'login_enqueue_scripts', 'ah_login_logo' );
Benutzeranmeldung nur mit E-Mail und Passwort
Seit der WordPress Version 4.5 ist eine Benutzeranmeldung auch mit einer E-Mail-Adresse und dem Passwort möglich. Um Hacker zu ärgern und WordPress ein bisschen sicherer zu machen, kannst Du Dich mit diesem Code ausschließlich mit E-Mail und Passwort anmelden.
<?php
// Ab hier kopieren
//WordPress Authentifikation löschen
remove_filter('authenticate', 'wp_authenticate_username_password', 20);
// Neue Authentifikation setzen - Anmelden nur mit E-Mail und Passwort
add_filter('authenticate', function($user, $email, $password){
//Check for empty fields
if(empty($email) || empty ($password)){
//create new error object and add errors to it.
$error = new WP_Error();
if(empty($email)){ //No email
$error->add('empty_username', __('<strong>ERROR</strong>: Email field is empty.'));
}
else if(!filter_var($email, FILTER_VALIDATE_EMAIL)){ //Invalid Email
$error->add('invalid_username', __('<strong>ERROR</strong>: Email is invalid.'));
}
if(empty($password)){ //No password
$error->add('empty_password', __('<strong>ERROR</strong>: Password field is empty.'));
}
return $error;
}
//Check if user exists in WordPress database
$user = get_user_by('email', $email);
//bad email
if(!$user){
$error = new WP_Error();
$error->add('invalid', __('<strong>ERROR</strong>: Either the email or password you entered is invalid.'));
return $error;
}
else{ //check password
if(!wp_check_password($password, $user->user_pass, $user->ID)){ //bad password
$error = new WP_Error();
$error->add('invalid', __('<strong>ERROR</strong>: Either the email or password you entered is invalid.'));
return $error;
}else{
return $user; //passed
}
}
}, 20, 3);
Hindere User daran, ihre Passwörter zu ändern
Der Administrationsbereich von WordPress ist das Herz und die Lunge deiner Website. Sorge stets dafür, dass die vergebenen Passwörter sehr stark sind, damit Angriffe keine Chance haben. User jedoch ändern die vergebenen Passwörter sehr gern in sehr leicht zu merkende und damit zu knackende Varianten. Das kannst du erfolgreich verhindern!
<?php
/**
*
* User davon abhalten, ihre Passwörter zu ändern
*
*/
class Password_Reset_Removed
{
function __construct()
{
add_filter( 'show_password_fields', array( $this, 'disable' ) );
add_filter( 'allow_password_reset', array( $this, 'disable' ) );
}
function disable()
{
if ( is_admin() ) {
$userdata = wp_get_current_user();
$user = new WP_User($userdata->ID);
if ( !empty( $user->roles ) && is_array( $user->roles ) && $user->roles[0] == 'administrator' )
return true;
}
return false;
}
}
$pass_reset_removed = new Password_Reset_Removed();
Dein Benutzer-Profil um weitere Social Media Accounts erweitern
Die biografischen Angaben in Deinem WordPress Profil sind recht mager ausgestattet. Viele Möglichkeiten hast du nicht, um all deine Sozialen Netzwerke zu verlinken. Mit diesem Code kannst du jeden deiner Social Media-Accounts hinzufügen und schnell im Theme anzeigen.
<?php
/**
* Managing contact fields for author bio
*/
$evolution_pro_Contactfields = new evolution_pro_Contactfields(
// Fehlende Accounts kannst du leicht ergänzen
array (
'Feed',
'Twitter',
'Facebook',
'GooglePlus',
'Flickr',
'Xing',
'Github',
'Instagram',
'LinkedIn',
'Pinterest',
'Vimeo',
'Youtube'
)
);
class evolution_pro_Contactfields {
public
$new_fields
, $active_fields
, $replace
;
/**
* @param array $fields New fields: array ('Twitter', 'Facebook')
* @param bool $replace Replace default fields?
*/
public function __construct($fields, $replace = TRUE)
{
foreach ( $fields as $field )
{
$this->new_fields[ mb_strtolower($field, 'utf-8') ] = $field;
}
$this->replace = (bool) $replace;
add_filter('user_contactmethods', array( $this, 'add_fields' ) );
}
/**
* Changing contact fields
* @param $original_fields Original WP fields
* @return array
*/
public function add_fields($original_fields)
{
if ( $this->replace )
{
$this->active_fields = $this->new_fields;
return $this->new_fields;
}
$this->active_fields = array_merge($original_fields, $this->new_fields);
return $this->active_fields;
}
/**
* Helper function
* @return array The currently active fields.
*/
public function get_active_fields()
{
return $this->active_fields;
}
}Mit dem folgenden Tag kannst du die neuen Felder im Theme anzeigen:
<?php echo get_the_author_meta( 'facebook' ); ?>
Eine sitemap.xml ohne Plugin erstellen
Die sitemap.xml sorgt in Verbindung mit der Google Search Console (ehemals Webmaster Tools) für eine schnelle Indexierung der Beiträge deiner Website. Bisher musstest du ein Plugin installieren, um eine sitemap.xml zu generieren. Mit diesem Code kannst du dir das Plugin sparen.
Die Sitemap wird für deine Beiträge, die Seiten und die Bilder der Mediathek erstellt.
<?php
// Ab hier kopieren
/**
* Eine eigene sitemap.xml ohne Plugin erstellen
* @author Andreas Hecht
*/
function ah_create_sitemap() {
$sitemap_posts = get_posts(array(
'numberposts' => -1,
'orderby' => 'modified',
'post_type' => array('post','page', 'attachment'), // Deine Custom Post Types hier einfügen (z.B. Portfolio)
'order' => 'DESC'
));
$sitemap = '<?xml version="1.0" encoding="UTF-8"?>';
$sitemap .= '<urlset xmlns="http://www.sitemaps.org/schemas/sitemap/0.9">';
foreach($sitemap_posts as $post) {
setup_postdata($post);
$postdate = explode(" ", $post->post_modified);
$sitemap .= '<url>'.
'<loc>'. get_permalink($post->ID) .'</loc>'.
'<lastmod>'. $postdate[0] .'</lastmod>'.
'<changefreq>monthly</changefreq>'.
'</url>';
}
$sitemap .= '</urlset>';
$fp = fopen(ABSPATH . "sitemap.xml", 'w');
fwrite($fp, $sitemap);
fclose($fp);
}
add_action('publish_post', 'ah_create_sitemap');
add_action('publish_page', 'ah_create_sitemap');Mache ein Beitragsbild erforderlich
Für Blogs mit mehreren Autoren kann das folgende Snippet Gold wert sein, denn es macht die Vergabe eines Beitragsbilds erforderlich, um einen Artikel veröffentlichen zu können.
<?php
add_action('save_post', 'evolution_check_thumbnail');
add_action('admin_notices', 'evolution_thumbnail_error');
function evolution_check_thumbnail($post_id) {
// change to any custom post type
if(get_post_type($post_id) != 'post')
return;
if ( !has_post_thumbnail( $post_id ) ) {
// set a transient to show the users an admin message
set_transient( "has_post_thumbnail", "no" );
// unhook this function so it doesn't loop infinitely
remove_action('save_post', 'evolution_check_thumbnail');
// update the post set it to draft
wp_update_post(array('ID' => $post_id, 'post_status' => 'draft'));
add_action('save_post', 'evolution_check_thumbnail');
} else {
delete_transient( "has_post_thumbnail" );
}
}
function evolution_thumbnail_error()
{
// check if the transient is set, and display the error message
if ( get_transient( "has_post_thumbnail" ) == "no" ) {
echo "<div id='message' class='error'><p><strong>Du musst ein Beitragsbild vergeben. Ohne Beitragsbild kann dieser Artikel nicht veröffentlicht werden.</strong></p></div>";
delete_transient( "has_post_thumbnail" );
}
}
Automatische Verlinkung in User-Kommentaren verhindern
Jede in die Kommentare eingefügte URL wird von WordPress automatisch mit einem Link umgeben. Das kann durchaus zu einem Problem werden, denn nicht immer sind es diese Links auch wert, von deinem Blog verlinkt zu werden. Das folgende Snippet macht aus den URLs reinen Text.
<?php
remove_filter('comment_text', 'make_clickable', 9);24 – Das komplette JavaScript in den Footer laden
WordPress lädt das JavaScript normalerweise in den Header deiner Website. Dadurch verlangsamt sich der Seitenaufbau ungemein. Mit diesem Code wird das JavaScript komplett im Footer der Website geladen, damit sich die Seite schneller aufbaut.
<?php
/**
* @uses wp_head() and wp_enqueue_scripts()
*
*/
if ( !function_exists( 'evolution_footer_scripts' ) ) {
function evolution_footer_scripts() {
remove_action('wp_head', 'wp_print_scripts');
remove_action('wp_head', 'wp_print_head_scripts', 9);
remove_action('wp_head', 'wp_enqueue_scripts', 1);
}
}
add_action( 'wp_enqueue_scripts', 'evolution_footer_scripts' );25 – Eine Breadcrumb-Navigation ohne Plugin erstellen
Für eine Breadcrumb-Navigation benötigst du kein überladenes Plugin. Einige Zeilen Code reichen vollkommen aus.
<?php
// Ab hier kopieren
function ah_the_breadcrumb() {
echo '<ul id="crumbs">';
if (!is_home()) {
echo '<li><a href="';
echo get_option('home');
echo '">';
echo 'Home';
echo "</a></li>";
if (is_category() || is_single()) {
echo '<li>';
the_category(' </li><li> ');
if (is_single()) {
echo "</li><li>";
the_title();
echo '</li>';
}
} elseif (is_page()) {
echo '<li>';
echo the_title();
echo '</li>';
}
}
elseif (is_tag()) {single_tag_title();}
elseif (is_day()) {echo"<li>Archive for "; the_time('F jS, Y'); echo'</li>';}
elseif (is_month()) {echo"<li>Archive for "; the_time('F, Y'); echo'</li>';}
elseif (is_year()) {echo"<li>Archive for "; the_time('Y'); echo'</li>';}
elseif (is_author()) {echo"<li>Author Archive"; echo'</li>';}
elseif (isset($_GET['paged']) && !empty($_GET['paged'])) {echo "<li>Blog Archives"; echo'</li>';}
elseif (is_search()) {echo"<li>Search Results"; echo'</li>';}
echo '</ul>';
}Der Tag zum Aufruf im Theme
Im Theme kann die Navigation mittels eines einfachen Funktionsaufrufes integriert werden. Die richtigen Dateien dafür wären je nach Theme die header.php, die index.php und die single.php usw.
<?php ah_the_breadcrumb(); ?>
Protect Your Site from Malicious Requests
There are various ways to secure your website. You can install a security plugin, turn on a firewall or opt for a free feature such as Jetpack Protect that blocks brute force attacks on your website.
The following code snippet, once placed in your functions.php file, rejects all malicious URL requests:
global $user_ID; if($user_ID) {
if(!current_user_can('administrator')) {
if (strlen($_SERVER['REQUEST_URI']) > 255 ||
stripos($_SERVER['REQUEST_URI'], "eval(") ||
stripos($_SERVER['REQUEST_URI'], "CONCAT") ||
stripos($_SERVER['REQUEST_URI'], "UNION+SELECT") ||
stripos($_SERVER['REQUEST_URI'], "base64")) {
@header("HTTP/1.1 414 Request-URI Too Long");
@header("Status: 414 Request-URI Too Long");
@header("Connection: Close");
@exit;
}
}
}
Add your Google Analytics tracking code
When updating a parent theme, one of the last things anyone thinks of is re-adding their Google Analytics tracking code. You can add it to your functions with this code snippet:
<?php add_action(‘wp_footer’,’ga’);function ga() { ?>// Place your Google Analytics code here <?php } ?>
Make the copyright date in the footer change automatically
It can be easy to forget about the copyright in the footer. You don’t want it to be 2020 with the copyright year 2016 glaring in your footer. That makes it look to visitors like your website isn’t being regularly updated. Enter this so you don’t have to worry about updating the copyright date ever again:
Simple PHP Solution for Dynamic Copyright Date
You would paste something like this in your theme’s functions.php file
1 | © 2009 – <?php echo date('Y'); ?> YourSite.com |
The problem with this issue is that you would have to add this once your site is at least one year old.
Elegant WordPress Solution for Dynamic Copyright Date
While surfing the web, we saw a more elegant solution suggested by @frumph of CompicPress Theme. They are using this function on their excellent ComicPress theme. This function will generate a dynamic copyright date based on the published date of your oldest post and your newest post. If it is the first year of your site, then this function will only display the current year.
To implement this dynamic copyright date in your WordPress footer, open your theme’s functions.php file and add the following code:
1 2 3 4 5 6 7 8 9 10 11 12 13 14 15 16 17 18 19 20 21 | function comicpress_copyright() {global $wpdb;$copyright_dates = $wpdb->get_results("SELECTYEAR(min(post_date_gmt)) AS firstdate,YEAR(max(post_date_gmt)) AS lastdateFROM$wpdb->postsWHEREpost_status = 'publish'");$output = '';if($copyright_dates) {$copyright = "© " . $copyright_dates[0]->firstdate;if($copyright_dates[0]->firstdate != $copyright_dates[0]->lastdate) {$copyright .= '-' . $copyright_dates[0]->lastdate;}$output = $copyright;}return $output;} |
Then open your theme’s footer.php file and add the following code where you want to display the date:
1 | <?php echo comicpress_copyright(); ?> |
This function will add the following text:
© 2009 – 2016
Exclude certain pages from WordPress search results
When a user performs a search query, there may be pages that you don’t want showing in the search results, such as confirmation pages. You can exclude those pages by using the following code:
function filter_search($query) {
if ($query->is_search) {
$query->set(‘post_type’, ‘page’);
}
return $query;
}
add_filter(‘pre_get_posts’, ‘filter_search’);
Add a Custom Dashboard Logo
If you want to add a bit more branding to your WordPress site this code snippet will replace the top left logo in your dashboard.
Make sure you upload an admin-icon.png to your theme’s directory. You can also change the CSS to link to any file in the background-image property.
<?php | |
//Adds a custom logo to the top left of the WordPress admin | |
function smartwp_custom_logo_wp_dashboard() { | |
echo "<style type='text/css'> | |
#wpadminbar #wp-admin-bar-wp-logo > .ab-item .ab-icon:before { | |
background-image: url('" . get_bloginfo('stylesheet_directory') . "https://cdn.smartwp.com/admin-icon.png'); | |
background-size: contain; | |
background-position: 0 0; | |
color:rgba(0, 0, 0, 0); | |
} | |
#wpadminbar #wp-admin-bar-wp-logo > .ab-item .ab-icon { | |
background-position: 0 0; | |
} | |
</style>"; | |
} | |
add_action('wp_before_admin_bar_render', 'smartwp_custom_logo_wp_dashboard'); |
Redirect New Registered Users to a Specific Page
If you require a new user to register on your WordPress site, you might want to redirect them to a specific page upon successful completion. Maybe you want to provide them with some important information or specific download.
1 | function wps_registration_redirect(){ |
2 | return home_url( '/finished/' ); |
3 | } |
4 | add_filter( 'registration_redirect', 'wps_registration_redirect' ); |
Limiting WordPress Post Revisions
Keeping track of post revisions in WordPress is a great feature – to a certain extent. If you do much editing within the WordPress editor it’s easy to end up with dozens or even hundreds of revisions stored in the database. An easy fix is to limit the number of revisions per post to something more reasonable like 3-5.
1 | if (!defined('WP_POST_REVISIONS')) define('WP_POST_REVISIONS', 5); |
2 | if (!defined('WP_POST_REVISIONS')) define('WP_POST_REVISIONS', false); |
Using the Current Year in Your Posts
Do you ever wish you could insert the current year in some of your posts via a simple shortcode?
Add the snippet below to your functions.php file and you’ll be partying like it’s [year].
1 | function year_shortcode() { |
2 | $year = date('Y'); |
3 | return $year; |
4 | } |
5 | add_shortcode('year', 'year_shortcode'); |
Remove the Private/Protected From Your Post Titles
In case you ever publish posts that are private, you’ll notice that the title is prefaced by an unsightly reminder. You can add the code below to your functions file and everything will look good again.
1 | function the_title_trim($title) { |
2 |
3 | $title = attribute_escape($title); |
4 |
5 | $findthese = array( |
6 | '#Protected:#', |
7 | '#Private:#' |
8 | ); |
9 |
10 | $replacewith = array( |
11 | '', // What to replace "Protected:" with |
12 | '' // What to replace "Private:" with |
13 | ); |
14 |
15 | $title = preg_replace($findthese, $replacewith, $title); |
16 | return $title; |
17 | } |
18 | add_filter('the_title', 'the_title_trim'); |
Show X Results on the Search Results Page
If you want to change the default number of search results returned to something greater or less that the default this snippet will let you do just that.
1 | function limit_posts_per_search_page() { |
2 | if ( is_search() ) |
3 | set_query_var('posts_per_archive_page', 20); |
4 | } |
5 |
6 | add_filter('pre_get_posts', 'limit_posts_per_search_page'); |
WordPress HTML Minify ohne Plugin
WordPress ist zum Teil ein aufgeblähtes System und das liegt auch an den vielen Plugins und Snippets, die Nutzer immer wieder in ihren Websites aktivieren. Weniger ist mehr, sollte es bei WordPress heißen, doch oft wird jedes noch so unwichtige Feature auch gleich umgesetzt. Wer das Weniger ist mehr Motto aber beachtet, der arbeitet stetig daran, dass WordPress schnell und performant bleibt. Ein wichtiger Schritt dabei ist die Minimierung vom Quelltext, also ein HTML Minify. Solche WordPress Minify-Plugins gibt es inzwischen wie Sand am Meer, auch Caching-Erweiterungen übernehmen diese Aufgabe mittlerweile häufig, doch meistens ist beides nicht perfekt oder nur bei Objekten im Cache in Verwendung. Abhilfe schafft das folgende HTML Minify Snippet für WordPress, welches nach meinen Tests auch dann Sinn macht, wenn ihr bereits ein Minify via Cache-Plugin nutzt. In meinen kurzen, und damit zugegebenermaßen nicht repräsentativen, Tests, zeigte sich nämlich, dass das Snippet schlichtweg schneller und sauberer arbeitet, als die Minify-Methoden der bekannten Caching-Erweiterungen oder Plugins von WordPress. Das mag mehrere Gründe haben, doch am Ende zählt nur, dass es schneller arbeitet und den eigenen Server oder Webspace nicht unnötig belastet.
Folgendes in die Functions.php eures Themes einfügen:
class WP_HTML_Compression {
protected $compress_css = true;
protected $compress_js = true;
protected $info_comment = true;
protected $remove_comments = true;
protected $html;
public function __construct($html) {
if (!empty($html)) {
$this->parseHTML($html);
}
}
public function __toString() {
return $this->html;
}
protected function bottomComment($raw, $compressed) {
$raw = strlen($raw);
$compressed = strlen($compressed);
$savings = ($raw-$compressed) / $raw * 100;
$savings = round($savings, 2);
return '<!-- HTML Minify | https://fastwp.de/magazin/html-minify/ | Größe reduziert um '.$savings.'% | Von '.$raw.' Bytes, auf '.$compressed.' Bytes -->';
}
protected function minifyHTML($html) {
$pattern = '/<(?<script>script).*?<\/script\s*>|<(?<style>style).*?<\/style\s*>|<!(?<comment>--).*?-->|<(?<tag>[\/\w.:-]*)(?:".*?"|\'.*?\'|[^\'">]+)*>|(?<text>((<[^!\/\w.:-])?[^<]*)+)|/si';
preg_match_all($pattern, $html, $matches, PREG_SET_ORDER);
$overriding = false;
$raw_tag = false;
$html = '';
foreach ($matches as $token) {
$tag = (isset($token['tag'])) ? strtolower($token['tag']) : null;
$content = $token[0];
if (is_null($tag)) {
if ( !empty($token['script']) ) {
$strip = $this->compress_js;
}
else if ( !empty($token['style']) ) {
$strip = $this->compress_css;
}
else if ($content == '<!--wp-html-compression no compression-->') {
$overriding = !$overriding;
continue;
}
else if ($this->remove_comments) {
if (!$overriding && $raw_tag != 'textarea') {
$content = preg_replace('/<!--(?!\s*(?:\[if [^\]]+]|<!|>))(?:(?!-->).)*-->/s', '', $content);
}
}
}
else {
if ($tag == 'pre' || $tag == 'textarea') {
$raw_tag = $tag;
}
else if ($tag == '/pre' || $tag == '/textarea') {
$raw_tag = false;
}
else {
if ($raw_tag || $overriding) {
$strip = false;
}
else {
$strip = true;
$content = preg_replace('/(\s+)(\w++(?<!\baction|\balt|\bcontent|\bsrc)="")/', '$1', $content);
$content = str_replace(' />', '/>', $content);
}
}
}
if ($strip) {
$content = $this->removeWhiteSpace($content);
}
$html .= $content;
}
return $html;
}
public function parseHTML($html) {
$this->html = $this->minifyHTML($html);
if ($this->info_comment) {
$this->html .= "\n" . $this->bottomComment($html, $this->html);
}
}
protected function removeWhiteSpace($str) {
$str = str_replace("\t", ' ', $str);
$str = str_replace("\n", '', $str);
$str = str_replace("\r", '', $str);
while (stristr($str, ' ')) {
$str = str_replace(' ', ' ', $str);
}
return $str;
}
}
function wp_html_compression_finish($html) {
return new WP_HTML_Compression($html);
}
function wp_html_compression_start() {
ob_start('wp_html_compression_finish');
}
add_action('get_header', 'wp_html_compression_start');
HTTP Verbindungen blocken
Manch eine Erweiterung telefoniert gerne einmal nach Hause. Soll heißen: Schlechte Plugins verbinden sich ständig mit fremden Websites und Diensten, lesen eventuell sogar Informationen eurer Website aus. Um dem vorzubeugen, könnt ihr mit einem Snippet solche HTTP Verbindungen von WordPress blocken.
Öffnet dafür eure wp-config.php und fügt folgenden Code ein:
define('WP_HTTP_BLOCK_EXTERNAL', true);
Ganz einfach und effektiv. Aber Vorsicht, denn manchmal funktioniert ein Plugin danach auch nicht mehr, weil es diese Funktion zwingend voraussetzt.
Performance und die Hearbeat API
WordPress Hosting ist zurzeit voll im Trend. Warum ist das wohl so? Weil WordPress eben ganz schön auf die Hardware geht und mit speziellen Anpassungen selbiger einfach deutlich besser läuft, als auf normalen Servern oder Hosting-Paketen. Mit ein paar Optimierungen lassen sich aber auch ohne spezielles Hosting viele Ressourcen einsparen und ich habe auch schon des Öfteren ein paar Tipps und Tricks bezüglich der WordPress Performance veröffentlicht. Jetzt folgt ein weiterer Hinweis, denn auch die WordPress Heartbeat API zieht ganz schön an der CPU und kann/sollte deshalb deaktiviert werden. Das geht eigentlich ganz einfach. Doch bevor wir damit anfangen: Was ist die WordPress Hearbeat API eigentlich genau?
Was ist die Heartbeat API eigentlich?
Die WordPress Hearbeat API hat ihren Namen bekommen, weil sie wie der menschliche Puls für das Herz funktioniert. Sie pocht also in regelmäßigen Abständen. Das zeigt schon wie und warum sie auf die Leistung eurer WordPress-Installation drückt, denn so ein Puls ist nun einmal beständig. Menschen ohne Puls leben nicht länger, bei WordPress ist das aber anders. Der Puls ist vielmehr eine ständige Anfrage an den Server, eine dauerhafte Belastung also. Die ist aber nur in wenigen Fällen wirklich notwendig, weshalb die WordPress Heartbeat API auch ruhig deaktiviert werden kann. Im Grunde sind damit nur alle Ajax-Aufrufe innerhalb von WordPress gemeint, die fortan abgeschaltet werden. Die Heartbeat API ruft also die „admin-ajax.php“ auf, welche wiederum die CPU des Servers stark belastet, weil sie alle paar Sekunden für eine Aktualisierung der Inhalte sorgt. Das wiederum ist ein Problem, weil selbige nun im ständigen Rhythmus aufgerufen wird, auch dann, wenn ihr gerade in einem anderen Tab oder Programm arbeitet. Ein Performance-Fresser also, der deaktiviert gehört.
WordPress Heartbeat API komplett deaktivieren:
add_action('init', 'stop_heartbeat', 1);
function stop_heartbeat()
{
wp_deregister_script('heartbeat');
}WordPress Heartbeat API nur im Dashboard deaktivieren:
add_action('init', 'stop_heartbeat', 1);
function stop_heartbeat()
{
global $pagenow;
if ($pagenow == 'index.php') wp_deregister_script('heartbeat');
}WordPress Heartbeat API überall außer bei Beiträgen deaktivieren:
add_action('init', 'stop_heartbeat', 1);
function stop_heartbeat()
{
global $pagenow;
if ($pagenow != 'post.php' && $pagenow != 'post-new.php') wp_deregister_script('heartbeat');
}Hinweise zur Deaktivierung der Heartbeat API
Wer die WordPress Heartbeat API überall deaktiviert, entlastet zwar die CPU seines Servers, muss aber auch auf automatische Speicherungen innerhalb der Beiträge verzichten. Solche automatisierten Aufrufe und Aufgaben funktionieren nämlich über die API und ist diese deaktiviert, so sind auch die entsprechenden Funktionen nicht mehr verfügbar. Den einen ist das egal, andere haben sich daran gewöhnt, deshalb gibt es oben drei verschiedene Snippets. So könnt ihr die Hearbeat API entweder komplett und überall deaktivieren, oder nur auf dem Dashboard abschalten. Außerdem kann die API auch überall außer beim erstellen von neuen Beiträgen deaktiviert werden, was dann die eben erwähnten automatischen Speicherungen etc. wieder zulässt. Allgemein gilt am Ende: Die WordPress Heartbeat API geht auf die Ressourcen des Servers, vor allem auf die CPU. Wer die Performance verbessern möchte, muss selbige also deaktivieren. Davon abgesehen sollte WordPress mit eingeschalter API auch nur geöffnet bleiben, wenn ihr aktiv damit arbeitet. Ist dies nicht der Fall, loggt euch lieber aus, denn sonst sendet die API immer wieder Anfragen. Ihr merkt schon, das Deaktivieren, zumindest teilweise, macht durchaus Sinn.
WordPress SEO Meta-Tags ohne Plugin
Für Suchmaschinenoptimierung gibt es inzwischen mehr als nur ein WordPress Plugin, zum Beispiel das All in One SEO Pack, wpSEO von Sergej Müller, sowie das Yoast Wordpress SEO Plugin. Doch sie alle haben inzwischen auch ein paar Probleme, denn allgemein sind sie schlichtweg zu umfangreich geworden. Gerade Yoast hat immer wieder Features in sein Plugin integriert, die weit über den Standard hinausgehen.
Für alle die ihr WordPress SEO Plugin aber bislang mehr oder weniger automatisch verwendet haben, ist das nun ein ziemlich großer Nachteil, weil der mittlerweile fast schon gigantische Funktionsumfang die Performance deutlich verschlechtert. Viele Nutzer brauchen all die Einstellungen aber eben gar nicht, denn viele vergeben nicht einmal Titel oder Description von Hand. Sie nutzen die Plugins also nur, um SEO Meta-Tags vollautomatisch und ohne Aufwand zu erzeugen.
Doch genau das geht auch deutlich einfacher und zwar mit einem sehr minimalistischen Snippet. Dabei habe ich selbiges hier noch weiter reduziert und angepasst, so dass wirklich nur noch das Allernötigste vorhanden ist. Wer das unten stehende WordPress Snippet bei sich nutzt, bekommt danach alle SEO relevanten Meta-Tags automatisch generiert, muss sich in Sachen Suchmaschinenoptimierung also um nichts mehr kümmern und vor allem keines der aufgeblähten Erweiterungen verwenden.
Der Vorteil bei dieser alternativen Lösung ohne Plugin und ist der, dass das kleine Snippet wesentlich performanter ist. Und das ist am Ende dann auch wieder für die Suchmaschinen gut, schließlich achtet Google auch auf die Ladezeiten einer Website.
SEO Meta-Tags Snippet
Das Snippet für WordPress generiert den Titel aus der Überschrift, nutzt als Description den Inhalt des jeweiligen Beitrags, generiert die Robot-Tags, verwendet sogar Keywords, welche ihr unten eigenhändig wählen könnt. Die sind für Google zwar nicht mehr wichtig, machen meiner Meinung nach aber dennoch Sinn.
Das Snippet bringt also alles mit was wichtig ist, vollautomatisch und ohne, dass ihr irgendetwas (Abgesehen von den Keywords) einstellen oder verändern müsst. Dabei richten sich alle verwendeten Meta-Tags an die idealen Vorgaben, könnten demnach kaum besser sein.
Hinweis: Denkt bitte daran beim Snippet die entsprechenden Keywords einzufügen, welche für euren Blog von Interesse sind.
function FastWP_seo() {
global $page, $paged, $post;
$default_keywords = 'KEYWORDS EINFÜGEN';
$output = '';
$description = get_bloginfo('description', 'display');
$pagedata = get_post($post->ID);
if (is_singular()) {
if (!empty($pagedata)) {
$content = apply_filters('the_content', $pagedata->post_content);
$content = substr(trim(strip_tags($content)), 0, 145) . '...';
$content = preg_replace('#\n#', ' ', $content);
$content = preg_replace('#\s{2,}#', ' ', $content);
}
} else {
$content = $description;
}
$output .= '' . "\n";
$cats = get_the_category();
if (!empty($cats)) foreach($cats as $cat) $keys .= $cat->name . ', ';
$keys .= $default_keywords;
$output .= "\t\t" . '' . "\n";
if (is_category()) {
$paged = (get_query_var('paged')) ? get_query_var('paged') : 1;
if ($paged > 1) {
$output .= "\t\t" . '' . "\n";
} else {
$output .= "\t\t" . '' . "\n";
}
} else if (is_home() || is_singular()) {
$output .= "\t\t" . '' . "\n";
} else {
$output .= "\t\t" . '' . "\n";
}
$url = ltrim(esc_url($_SERVER['REQUEST_URI']), '/');
$name = get_bloginfo('name', 'display');
$title = trim(wp_title('', false));
$cat = single_cat_title('', false);
$search = get_search_query();
if ($paged >= 2 || $page >= 2) $page_number = ' | ' . sprintf('Seite %s', max($paged, $page));
else $page_number = '';
if (is_home() || is_front_page()) $seo_title = $name . ' | ' . $description;
elseif (is_singular()) $seo_title = $title . ' | ' . $name;
elseif (is_category()) $seo_title = '' . $cat . ' | ' . $name;
elseif (is_archive()) $seo_title = ' ' . $title . ' | ' . $name;
elseif (is_search()) $seo_title = '' . $search . ' | ' . $name;
elseif (is_404()) $seo_title = '' . $url . ' | ' . $name;
else $seo_title = $name . ' | ' . $description;
$output .= "\t\t" . '' . "\n";
return $output;
}Automatisch SEO Meta-Tags setzten
Das Snippet oben setzt nun also automatisch die entsprechenden Meta-Tags in WordPress und ist somit eine echte Alternative zu den großen SEO Plugins. Gerade für Anfänger ist das Snippet sogar besser, genau wie für alle, die Titel und Description ihrer Beiträge sowieso nicht von Hand eingeben, sondern automatisch generieren lassen.
Das WordPress Snippet macht in diesem Fall genau das selbe wie die Erweiterungen, nur eben komplett kostenlos, deutlich schneller, demnach also auch effektiver. Mein Tipp bei solchen SEO-Sachen ist immer: Probiert es einfach mal aus und wartet, wie es sich nach einer Woche auf Ranking etc. ausgewirkt hat.
Also deaktiviert euer SEO Plugin, nutzt als Alternative das Snippet oben und schaut, ob es positive oder negative Auswirkungen hat. Bringt es euch nichts, dann aktiviert ihr halt wieder das alte Plugin. Wird euer Blog dagegen deutlich schneller, effektiver und rankt dabei auch noch besser, dann lasst das Snippet aktiv und löscht euer WordPress SEO Plugin komplett.
Wichtig ist am Ende nur die Performance und der Mehrwert, doch weil viele der oben bereits genannten Plugins inzwischen langsam und überladen sind, können selbige genau das nur noch selten gewährleisten. Das Snippet kann dies – ihr werdet es erleben.
Create A Back to Top Button in WordPress
Back to top button can be useful to visitors reading long articles or browsing large pages. After reading a long article, scrolling browser window back to top can be a little frustrating and not very user friendly at all. Your visitors shouldn’t have to scroll all the way to the top. Creating a good user experience on your website is very important to keep people on the page.
Although there are many WordPress plugins available to add this feature on your website but it’s fairly very easy to create a back to top button. And you shouldn’t want to use a plugin when you can create sometime with couple of lines of code. So here is how to create the back to top button without using a plugin or editing core WordPress files. We will use smooth scrolling effect with jQuery for better user experience to avoid fast jumping.
First, we need to create the link. For that paste this code in your theme functions.php file.
// add back to top button in wordpress footer
function wcs_add_back_to_top() {
echo '<a id="toTop" href="#">Back to Top ↑</a>';
}
add_action( 'wp_footer', 'wcs_add_back_to_top' );And now we can style the button with the following CSS.
/* css styles for back to top button */
#toTop {
padding: 10px 20px;
font-weight: bold;
color: #FFF;
text-decoration: none;
position: fixed;
bottom: 40px;
right: 40px;
display: none;
background: rgba(0, 0, 0, 0.5);
}And finally copy and paste the following in the Javascript file to add the Javascript functionality.
jQuery(document).ready(function($) {
$(window).scroll(function(){
if ( $(this).scrollTop() > 100 ) {
$('#toTop').fadeIn();
} else {
$('#toTop').fadeOut();
}
});
$('#toTop').click(function(){
$('html, body').animate( {scrollTop : 0}, 800 );
return false;
});
});With only three easy steps, now we have a back or scroll to top link with smooth scrolling effect.
How to Auto Link Keywords in Post Content And Excerpt
in Functions
If you are a blogger and make some cash from affiliate marketing then you probably insert affiliate links into the articles on your website, so that you get paid when a visitor purchase a product that you recommended. But if you are just starting out on affiliate marketing and want to insert affiliate link keywords into couple of hundred existing articles on your website then adding links manually in each article is not what you want to spend your time on. Because it’s exhausting and will consume lots of your time to modify all these articles. Rather than inserting these link keywords manually, you want them generated automatically so that all you had to do is specify the link keywords and your affiliate link.
In the past, we wrote about adding meta description tags and nofollow links to improving SEO of your website and in this article we will show you an easy way to automatically link keywords in post content and post excerpt on your WordPress website. Although, when it comes to SEO or affiliate marketing, I would strongly recommend you to use a dedicated plugin but sometimes you want a simpler and quicker solution for your problem. So here is a simple function to insert link keywords in content of your articles automatically.
Just change the keyword and links in following WordPress snippet and paste this into your functions.php file and it will automatically link keywords on your website.
// auto link keywords in post content and excerpt
function wcs_auto_link_keywords( $text ) {
$replace = array(
'wordpress' => '<a href="http://www.wordpress.org">wordpress</a>',
'google' => '<a href="http://www.google.com">excerpt</a>',
'facebook' => '<a href="http://www.facebook.com">function</a>'
);
$text = str_replace( array_keys($replace), $replace, $text );
return $text;
}
add_filter( 'the_content', 'wcs_auto_link_keywords' );
add_filter( 'the_excerpt', 'wcs_auto_link_keywords' );
How to Protect wp-config.php with .htaccess
in Security
To tighten security of your WordPress blog/website, you should prevent direct access to wp-config.php file. You can prevent this with htaccess. Adding this simple code to your .htaccess file will prevent unauthorized access to your wp-config.php file.
# Disable direct access to wp-config.php
<files wp-config.php>
order allow,deny
deny from all
</files>How to Open All External Links In New Window
in FunctionsAlmost all web sites provide links to other sites, but it’s generally good practice to open these “external” links in a new window or tab. This makes it clear that the content is not part of your site, and also leaves your site open in the browser so the user can easily return.
To make a link open in new window or tab, you can add target=”_blank” attribute in link straight with HTML. The only problem is that, it’s invalid markup. But you can accomplish this easily with jQuery.
Just paste this jQuery snippet in footer.php of your theme.
<script type="text/javascript">
//<![CDATA[
jQuery(document).ready(function($) {
$('a').each(function() {
var a = new RegExp('/' + window.location.host + '/');
if(!a.test(this.href)) {
$(this).click(function(event) {
event.preventDefault();
event.stopPropagation();
window.open(this.href, '_blank');
});
}
});
});
//]]>
</script>How to Speed Up WordPress With Browser Caching
in Optimization & Best PracticeBrowser caching can help to reduce server load by reducing the number of requests per page. By setting the correct file headers on static files that don’t change (like Images, CSS, JavaScript etc) browsers will then cache these files on the user’s computer. This technique allows the browser to check to see if files have changed, instead of simply requesting them from server.
By using this code snippet in your .htaccess file, your static files will be cached for much longer time and produce faster loading of website/webpages, since browser do not need to request and download then again.
# Browser Caching
<IfModule mod_expires.c>
ExpiresActive On
ExpiresByType image/jpg "access 1 year"
ExpiresByType image/jpeg "access 1 year"
ExpiresByType image/gif "access 1 year"
ExpiresByType image/png "access 1 year"
ExpiresByType text/css "access 1 month"
ExpiresByType application/pdf "access 1 month"
ExpiresByType text/x-javascript "access 1 month"
ExpiresByType application/x-shockwave-flash "access 1 month"
ExpiresByType image/x-icon "access 1 year"
ExpiresDefault "access 2 days"
</IfModule>How to Remove WordPress Generator Meta Tag Completely
in SecurityBy default WordPress adds generator meta tag in website head section. The WordPress generator meta tag displays your website’s WordPress version for anyone to see.
It can be considered a security risk to make your WordPress version visible and public. Because you are providing the hacker with the useful information by telling them which version of WordPress you are running.
Although it is very easy to remove this meta tag without modifying core WordPress files. Just copy and paste this code snippet in your theme’s functions.php file and forget about it forever.
// remove WordPress generator meta tag completely
function wcs_remove_generator_tag() {
return '';
}
add_filter( 'the_generator', 'wcs_remove_generator_tag' );How to Encode Email Address With Shortcode
in SecurityIt is generally a bad idea to post your email address in plain text format on your website. It will most likely to get picked up by a spam bot and once it is in the hands of a spammer, your inbox will be filled with spam in no time.
WordPress offers a way to protect your email address from displaying it publicly in plain text format. Here is a shortcode to encode email address in WordPress.
// encoded your email address with shortcode
function wcs_encode_email_address( $atts, $content ) {
return '<a href="mailto:' . antispambot( $content ) . '">' . antispambot( $content ) . '</a>';
}
add_shortcode( 'email', 'wcs_encode_email_address' );Now you can use “email” shortcode in your content to display encoded email address. Here is a example.
// email shortcode usage
email@domain.comHow to Display Custom Message on WordPress Login Page
in WordPress AdminYou can display your own custom message on the WordPress login form by using the filter login_message. This is a great trick if you’re working on a client’s project or have a multi author blog. You can add a welcome message for your users or give them important information/instruction about the admin section or you can add anything that you want to display to your users.
If you need to display a custom message on WordPress login page, you can use the following snippet to add your message on the login page.
// display custom message on wordpress login page
function wcs_custom_login_message( $message ) {
return "<pclass='message'>Welcome! Please log in with demo account.</p>";
}
add_filter( 'login_message', 'wcs_custom_login_message' );And if you want to display a custom message on the registration screen, use this snippet.
// display custom message on wordpress registration page
function wcs_custom_registration_message( $message ) {
return "<pclass='message'>Hello! Please register to access freebies section.</p>";
}
add_filter( 'register_message', 'wcs_custom_registration_message' );WordPress SVG Upload erlauben
Hier findest du beispielsweise 2 Snippets, die du auf eigene Verantwortung verwenden könntest:
/**
* add SVG to allowed file uploads
**/
function add_file_types_to_uploads($file_types){
$new_filetypes = array();
$new_filetypes['svg'] = 'image/svg+xml';
$file_types = array_merge($file_types, $new_filetypes );
return $file_types;
}
add_action('upload_mimes', 'add_file_types_to_uploads'); ODER
/**
* Add svg support
**/
add_filter( 'wp_check_filetype_and_ext', function( $data, $file, $filename, $mimes) {
global $wp_version;
if( $wp_version == '4.7' || ( (float) $wp_version < 4.7 ) ) {
return $data;
}
$filetype = wp_check_filetype( $filename, $mimes );
return [
'ext' => $filetype['ext'],
'type' => $filetype['type'],
'proper_filename' => $data['proper_filename']
];
}, 10, 4 );
function dl_mime_types( $mimes ){
$mimes['svg'] = 'image/svg+xml';
return $mimes;
}
add_filter( 'upload_mimes', 'dl_mime_types' );
function dl_fix_svg() {
echo '<style type="text/css">.attachment-266x266, .thumbnail img { width: 100% !important; height: auto !important;} </style>';
}
add_action( 'admin_head', 'dl_fix_svg' );How to Change WordPress Logo on Login Page
WordPress provides their own logo on user registration and login pages but sometimes it is required to replace that with your/client logo especially for branding purpose. You can easily change the default WordPress logo on the Login page with the help of admin_head WordPress action.
Here is a simple code snippet that will allow you to change the WordPress login logo.
All you have to do is to copy this code into your theme’s functions.php file and change the logo image url with the image you want to use and it’s done.
// change wordpress logo on login page
function wcs_custom_login_page_logo() {
echo '<styletype="text/css">
#header-logo {
background-image: url(' . get_bloginfo( 'template_directory' ) . '/images/admin-logo.png) !important;
}
</style>';
}
add_action( 'admin_head', 'wcs_custom_login_page_logo' );Isn’t it as simple as eating a pie. Well, may be not that easy but it’s close enough. 😉
How to Change WordPress Post Autosave Settings
WordPress has a very useful feature which will automatically save your current draft every 30 seconds, as you type and you will not even notice.
You can change the time interval settings on how often WordPress auto saves by adding a setting in the wp-config.php file. Let’s say you want to autosave drafts every 10 minutes. To do this, you need to add below settings to your wp-config.php file. Note that you need to add time in seconds and not minutes. Your post drafts will now be auto saved at every 600 seconds.
// autosave draft interval set to 10 Minutes
define( 'AUTOSAVE_INTERVAL', 600 );Although it’s a very useful feature for a content writer but for some reason if you do not want auto saving of drafts, you can turn this feature off. You can easily disable this feature by increasing the autosave time interval to a very long time. For example a week long time interval practically force WordPress to never autosave drafts.
// autosave draft interval set to 1 week
define( 'AUTOSAVE_INTERVAL', 604800 );
How to Delete Post Revisions Using Functions.php File
in FunctionsPost revisions are a way for users to keep a working collection of each different version of a post and then revert back to it in the future if necessary. It is a useful feature for some but some find it to be totally useless because cluttering of WordPress database, gobbles up disk space, and usually doesn’t work as intended. Fortunately, we have ways to disable post revisions and we can also get rid of old post revision entries from WordPress database to make it smaller and lighter.
There are a couple of different methods to delete post revisions from WordPress database. Many people try to delete WordPress revisions by running a MySQL query in the database using a tool like phpMyAdmin. I also run MySQL query to delete post revisions as far as I could remember but recently I found a neat way to accomplish the same without even leaving WordPress.
To delete post revisions from WordPress database hassle free, you can paste this code snippet in you functions.php file and visit your website once.
// delete post revisions from wordpress
$wpdb->query( "
DELETE FROM $wpdb->posts
WHERE post_type = 'revision'
" );Don’t forget to remove this piece of code immediately after you delete post revisions. You only need to run this code once, there’s no need to keep this code in your theme’s functions.php file, as it will always delete all post revisions.
Also, it’s worth mentioning that every time you try to do something with your database, keep a backup first. Because you never know when things go wrong.
How to Automatically Empty Trash in WordPress
When you delete a post, page, or comment from your blog, it will be moved to the Trash folder. This feature makes it extremely difficult to accidentally delete a post or page from your WordPress website. Items within your trash folders can be restored or permanently deleted within 30 days after it is sent to the trash which is the default time limit in WordPress. Each item after 30 days of their original trashing will be permanently deleted and it’s not possible to restore them.
If you are one of those people who is always very careful about what they delete or what they don’t, then you can disable trash completely and can choose to permanently purge items as you hit delete button. Although I am strongly against this idea or disabling WordPress trash feature because you never know when you need to restore a item you accidentally hit delete button. I would suggest that you keep this feature enabled but configure it to be automatically cleaned every day, if cleaning trash every week is not an option.
To automatically empty trash in WordPress every week, you can paste this little code snippet in wp-config.php file. It will permanently delete each item 7 days after it is sent to the trash.
// automatically empty trash weekly
define( 'EMPTY_TRASH_DAYS', 7 );Else, if you want to automatically empty trash daily then you can change constant’s value to 1, like this.
// automatically empty trash daily
define( 'EMPTY_TRASH_DAYS', 1 );Now if you are absolutely sure that you want to disable trash then you can set this value to 0. This will make the trash functionality will be disabled and the ‘Delete Permanently’ button will appear instead of ‘Trash’ button. If you click ‘Delete Permanently’ button, the item will immediately deleted without any alert message.
// disable wordpress trash completely
define( 'EMPTY_TRASH_DAYS', 0 );
How to Get The First Image From Posts & Display
in Media
Post Thumbnails is a theme feature introduced in WordPress Version 2.9. It was quickly changed to Featured Images with Version 3.0. Basically, Post Thumbnail/Featured Image allows you to upload and assign a custom image to an article that is chosen as the representative image for Posts, Pages or Custom Post Types. Usually blog owners display this custom image at the top of each post. This feature has now become a standard for theme designers and developers. But often, you find some old blogs have a whole archive of posts with no featured image displayed. No, they did not just forget to upload Featured Image on older posts but it would take too much time to go through each post and add a featured image now. To help you with this issue, you can get the first image from posts and display it instead of featured image, if no featured image is present.
In this example we will be using featured image for new posts as intended but for old archive posts we will use the first image it finds in the post content for the thumbnail, or a default/fallback image if none present.
You can paste this code snippet in your functions.php file to retrieve the first image from posts.
// automatically retrieve the first image from posts
function get_first_image() {
global $post, $posts;
$first_img = '';
ob_start();
ob_end_clean();
$output = preg_match_all( '/<img .+src=[\'"]([^\'"]+)[\'"].*>/i', $post->post_content, $matches );
$first_img = $matches[1][0];
if ( empty( $first_img ) ) {
// defines a fallback imaage
$first_img = get_template_directory_uri() . "/images/default.jpg";
}
$first_img = '<imgsrc="' . $first_img . '" alt="Post Image" />';
return $first_img;
}If you just want to show first image from post and do not want to use featured image at all then you simply need to use this code in your theme files where you want to display images.
<?php echo get_first_image(); ?>But if you do want to the benefit of featured image on new posts and still want to show first image from old archive posts with image fallback then use this piece of code in your theme files.
<?php
if ( get_the_post_thumbnail( $post_id ) != '' ) {
the_post_thumbnail();
} else {
echo get_first_image();
}
?>
How to Protect Htaccess Files in WordPress Website
in Security
As you already know, the HTAccess file is a very powerful tool for manipulating site performance and functionality. It also allows you to control files and folders in the current directory, and all sub-directories. That is why it’s very critical for your website security to protect HTAccess files of your website from any unauthorized access.
Earlier we have seen how to protect wp-config.php file and .svn Folders with the help of HTAccess. Now in this article we will show you how you can protect HTAccess files.
Fortunately, preventing access to your HTAccess files is relatively very easy. The following snippet will stop hackers from accessing your HTAccess files. You can, of course, still edit the file yourself via FTP client and through your hosting control panel’s file manager. Just paste this snippet in your HTAccess File.
# protect .htaccess files
<Files .htaccess>
Order Allow,Deny
Deny from all
</Files>It’s important to remember that you should always keep a backup of current working version of your HTAccess file before you begin editing. Because even if you are cautious, accidents can happen, and you would not believe how frequently they do. And in case of any error or misconfiguration in HTAccess file can usually cause your whole website to go down. So keep a backup.
How to Increase The PHP Memory Limit in WordPress
I am sure you must have noticed a ‘Fatal Error : Memory Size Exhausted’ error when you install a lot of plugins, upgrade to the latest WordPress version or even sometime you’ll find an error in your Dashboard widget which prevents them from loading completely. It’s a very common memory size error in WordPress and it happens when WordPress doesn’t have enough memory to achieve what you want. Such types of errors arise because the PHP memory limit is less than what the process requires for performing its functions.
Many web hosts set the default PHP memory limit to 32MB or less on shared hosting environment and it’s pretty less than the basic requirement for proper functioning a WordPress website. The default memory allocation to WordPress is 40MB for single site WordPress installs and 64MB for installs. If the value in the php.ini is more than the default allocated WordPress amount, then WordPress will use that value. But sometimes your WordPress website requires more memory to run some PHP process and for that you will have to increase the PHP memory limit.
There are number of ways to increase the PHP memory limit on a web server, so you can choose a method best suited for you.
With wp-config.php
You can change the PHP memory limit of your WordPress website from wp-config.php file. Paste this code snippet in wp-config.php to increase the PHP memory limit to 64MB. When you change this option in the wp-config.php it will only affect your WordPress current site and not any other PHP sites.
// increase the php memory limit in wordpress
define( 'WP_MEMORY_LIMIT', '64M' );With htaccess
You can even change the memory limit of PHP from your sites .htaccess file also. Paste this following line to your htaccess file.
# increase the php memory limit in wordpress
php_value memory_limit 64MWith PHP.ini
If you have access to php.ini file then you can change the memory limit of your website by changing the value of property memory_limit.
# increase the php memory limit in wordpress
memory_limit = 64M
How to Add A Favicon To Your WordPress Website
in Functions
Favicons, short for favorite icons, are a small but significant part of branding a website. They are used to display a 16×16 or 32×32 pixel image before the page title in your browser window. Favicons are also used for bookmarks in browsers and touchscreen devices. Favicons not only make your blog look more professional, but they also make it easier for people to find it in their long lists of bookmarks and favorites. Anyone can create a favicon and add it to their third-party hosted WordPress blog or website. It’s extremely very simple.
Fortunately, installing a favicon on your WordPress site is a piece of cake. And although there are plugins available that can do it for you, such a task definitely falls into the “you absolutely do not need to use a plugin for this” category. After all, you want to keep your site lean and mean.
Simply upload your favicon to website root folder and paste this code snippet in your functions.php file.
// add a favicon to your wordpress website
function wcs_add_favicon() {
echo '<link rel="icon" type="image/x-icon" href="' . esc_url( home_url( '/' ) ) . 'favicon.ico" />';
}
add_action( 'wp_head', 'wcs_add_favicon' );If you have uploaded your favicon in your theme image folder then you can use this code snippet.
// add a favicon to your wordpress website
function wcs_add_favicon() {
echo '<link rel="icon" type="image/x-icon" href="' . get_template_directory_uri() . '/favicon.ico" />';
}
add_action( 'wp_head', 'wcs_add_favicon' );I would recommend uploading favicon in root folder because many browser and services simply check favicons at website root. And if they do not find it there, they return 404 error.
How to Change Pages Link to Display Published Pages Only
In previous articles we have seen ways to remove submenu items and add link to all options in WordPress admin, In this article we will see how to change pages link in WordPress menu to display published pages.
By default, Pages link in WordPress admin dashboard shows a list of all pages, no matter what their publishing status is. If you want to display published pages, you can filter your page list by visiting “Published” tab. It should not be a major problem for a regular blogger but if you have a lot of drafts then it would be difficult for you to identify publish pages on default pages list. Although you can always visit Published tab to display published pages but getting only to display them requires another click and full reload.
WordPress provides a very nice way to change default dashboard menu links. With the help of WordPress action admin_menu, we can change the default behavior of menu links and force WordPress to display list of published pages only.
To display published pages by default on pages link, simply paste this code snippet in your functions.php. You can then visit “All” tab to see full list of pages.
// change page link to display published pages only
function wcs_change_admin_page_link() {
global $submenu;
$submenu['edit.php?post_type=page'][5][2] = 'edit.php?post_type=page&post_status=publish';
}
add_action( 'admin_menu', 'wcs_change_admin_page_link' );If you want to achieve the same for post link in admin dashboard then use following code snippet instead.
// change post link to display published posts only
function wcs_change_admin_post_link() {
global $submenu;
$submenu['edit.php'][5][2] = 'edit.php?post_status=publish';
}
add_action( 'admin_menu', 'wcs_change_admin_post_link' );
How to Completely Disable Sidebars in WordPress
in Themes
Sidebar is a theme feature introduced with WordPress Version 2.2. It’s basically a vertical column provided by a theme for displaying information other than the main content of the web page. Themes usually provide at least one sidebar at the left or right of the content. These sidebars usually contain widgets that an administrator of the site can customize. Apart from standard sidebars you can register more sidebars in WordPress as you require. But in this article we will see how to disable sidebars in WordPress completely.
One might ask, why do you even want to disable a sidebar. Simply do not register it in first place, if you are not planning to use it on your website. That’s good point but sometimes you might not have an option. These days users use a parent theme framework as a base and create a child theme for customizing their website. Using child theme has many benefits, first and best of all is easy theme updates without worrying about resetting your modifications on each update. For example, TwentyTen theme have four footer sidebars and there are very good changes that you might not be using them all on your website. But if you remove those sidebars from functions.php then they will come back once you update TwentyTen theme in future. The solution to this issue is to use a child theme and disable sidebars from child theme’s functions.php.
Here is the code snippet you can paste in your theme’s functions.php to completely disable sidebars in WordPress. Don’t forget to replace sidebar-id in following code.
// completely disable sidebars in wordpress
function wcs_disable_sidebar() {
unregister_sidebar( 'sidebar-id' );
}
add_action( 'widgets_init', 'wcs_disable_sidebar', 11 );Here is another example to disable sidebars from footer of TwentyTen theme that we mentioned earlier.
// disable sidebars in wordpress
function wcs_disable_twentyten_sidebars() {
// unregister some of the TwentyTen sidebars
unregister_sidebar( 'first-footer-widget-area' );
unregister_sidebar( 'second-footer-widget-area' );
unregister_sidebar( 'third-footer-widget-area' );
unregister_sidebar( 'fourth-footer-widget-area' );
}
add_action( 'widgets_init', 'wcs_disable_twentyten_sidebars', 11 );
How to Use Custom Permalink Structure for Pages in WordPress
in Functions
Permalinks are the permanent URLs to your individual blog posts, pages as well as categories, tags and other lists of blog postings. By default, WordPress uses post ID query string as permalink structure rule but it’s not very user-friendly, and it is also not Search Engine Friendly. It is better to refer a visitor to a URL such as http://www.yourwebsite.com/news-story/ than http://www.yourwebsite.com/?page_id=928923. That’s why WordPress comes with an option to change the default structure to pretty URLs and human readable. Most of the website owners use “/%postname%/” as their permalink structure because it generates short memorable URLs of post and pages.
WordPress use same permalink structure rule for all website entries and lists. But sometimes you may want to use custom permalink structure only for pages for better search engine optimization. For example if you use blog prefix for all blog posts (e.g. http://www.yourwebsite.com/blog/news-story/) and don’t want to use this prefix for pages, then you are out of luck because WordPress does not provide an easy way to do that. In this article we will show you how to change permalink structure rules for pages while keep using standard rules for blog posts and others items.
To define custom permalink structure rules for pages, simply paste this code snippet in your theme’s functions.php file. In this example, we are adding page prefix for pages followed by their title. This is just an example, but you should use different custom permalink structure rules, better suited for your website.
// use custom permalink structure for pages in wordpress
function custom_page_rules() {
global $wp_rewrite;
$wp_rewrite->page_structure = $wp_rewrite->root . 'page/%pagename%/';
}
add_action( 'init', 'custom_page_rules' );By adding this code will not make pages to use new custom permalink structure and you will see 404 error pages. Don’t panic, everything is normal. Just visit permalink settings section in WordPress admin panel and WordPress will enforce new permalink structure rules.
How to Limit The Post Title in WordPress by Word Count
in Functions
This is not a function that you would need to use on daily basis, but I came across a reason to use it recently on a project and I thought it might be a good idea to share it here too. All it does is limit the post title by the number of words, just in case you don’t want the title to wrap onto a second line or third. I used this function to limit the post title in a featured sideshow since the size of the box is fixed and to fit caption text properly in that limited space, I had to limit the title captions to have maximum of 10 words.
WordPress has a not so well-known function wp_trim_words() to trim given text by word count. This is a very useful function for WordPress developers to make sure that their design/website do not break even if some user insert hundreds of words in a post title. To limit the post title you can use this code snippet in your theme. This following snippet will allow post title to have maximum of 10 words. Of course you can change word count limit based on your requirements.
<?php
echo wp_trim_words( get_the_title(), 10, '' );
?>The above WordPress snippet is used on case basis in theme files but for whatever reason, if you are in need to limit all post titles by default then you can paste this following code snippet in your theme’s functions.php file and it will limit the post titles to 10 words all over the website. Although it’s not a good idea to limit the post titles by default, but the WordPress snippet is here if you want to use.
// limit the post title in wordpress by word count
function wcs_limit_word_count_in_post_title( $title ) {
return wp_trim_words( $title, 10, '' );
}
add_filter( 'the_title', 'wcs_limit_word_count_in_post_title' );
How to Insert Google Maps Using a Shortcode Without Using a Plugin
in Shortcode
Google Maps is probably one of the best services out there for people to quickly get directions online. For business point of view, there are number reasons, why you should embed a Google map into your WordPress website. Whether you want to guide your users to your physical location or maybe you are just using Google map for a background graphic only, it’s always nice to create rich content that are useful and highly interactive. So in this tutorial, I will show you how to insert Google maps using a shortcode in WordPress. You may also be interested in knowing how to add PayPal donation button with shortcode too.
There are many plugins available in official plugin repository to get this job done but it’s really not that complex to embed Google maps into WordPress posts and pages. Google maps actually provides copy-and-pastable iframe code that is really quick and easy to snag. All we need to do is to create a function for our shortcode to insert Google map URL in right place. So here is the code snippet that you can add in your theme’s function.php file to create Google maps Shortcode.
// insert Google maps using a shortcode
function wpcs_googlemap_shortcode( $atts, $content = null ) {
extract( shortcode_atts( array(
"width" => '640',
"height" => '480',
"src" => ''
), $atts ) );
return '<iframesrc="' . $src . '&output=embed" width="' . $width . '" height="' . $height . '" frameborder="0" scrolling="no" marginheight="0" marginwidth="0"></iframe>';
}
add_shortcode( "googlemap", "wpcs_googlemap_shortcode" );Now you can insert Google maps using a shortcode in any WordPress post or page. Here is the example usage of this shortcode.
[googlemap width="400" height="300" src="[map-url]"]You will need to insert Google map URL in above shortcode which you can get from their website.
How to Disable Update Check and Notification for Specific Plugin
in Functions
Sometimes when you login to the admin section of your WordPress website, you may see a number in a red bubble next to the Plugins-item in the menu. This indicates that some of your plugins have updates available and are ready to install from WordPress plugin respiratory.
It is strongly advised to keep your plugins up to date since plugin updates usually come with new additional features and more importantly with many security fixes.
But there are times when you don’t want to receive updates for a specific plugin because you may have modified plugin core files and updating plugin will simply wash away your customizations
The situation become direr when you setup a WordPress website for your client and he accidentally updates all plugins resulting in broken website or at least broken functionality in some part of the website.
To avoid such scenarios and fixing your WordPress website later on, you may want to disable update check as well as update notification for a specific plugin for a website.
Previously we have posted code snippet for disabling updates for all plugins in WordPress. If you are looking for a solution to disable update check for all plugins then you must head over there and use provided code snippet.
To disable the updates for specific plugin(s), we will use same method but restrict http request for plugins that we do not want to update. So here is the function you can paste in your functions.php file of your theme.
// Disable Update Check and Notification for Specific Plugin
function wcs_disable_plugin_update_check( $r, $url ) {
if ( 0 !== strpos( $url, 'http://api.wordpress.org/plugins/update-check' ) )
return $r;
// array of the plugins
$blocked_plugins = array(
'akismet/akismet.php',
'contact-form-7/wp-contact-form-7.php',
);
if ( 0 === (int) count( $blocked_plugins ) )
return $r;
$installed_plugins = unserialize( $r['body']['plugins'] );
foreach( $blocked_plugins as $p ) {
unset( $installed_plugins->plugins[ $p ] );
unset( $installed_plugins->active[ array_key_exists( $p, $installed_plugins ) ] );
}
$r['body']['plugins'] = serialize( $installed_plugins );
return $r;
}
add_filter( 'http_request_args', 'wcs_disable_plugin_update_check', 5, 2 );In this example, we have disabled updates check for Akismet and Contact Form 7 plugins. Of course you must modify this code snippet and add path of the plugins that you do not want to receive updates as well as notifications.
How to Disable Automatic Compression of JPG in WordPress
in Optimization & Best Practice
WordPress has built in compression for JPG images. Whenever you upload an JPG/JPEG image to WordPress media library, WordPress will automatically compress your images to 90% of the original quality, this is intended to help your pages load faster and keep file sizes smaller.
But sometime it’s essential to have high quality images on your website. For example if you are a photographer or have a portfolio website, then it’s very important that you must always have the highest quality images on your website.
If having best quality images on your website is absolutely necessary for you too, then you can disable automatic compression of JPG in WordPress by changing the default JPG compression to 100% and tell WordPress to load these file at their original quality.
All you have to add the following code snippet to your functions.php file, this will run when compressing your images and return the value of the quality you want.
// set minimum word count to publish post
function wcs_disable_image_compression( $arg ) {
return 100;
}
add_filter( 'jpeg_quality', 'wcs_disable_image_compression' );
add_filter( 'wp_editor_set_quality', 'wcs_disable_image_compression' );
How to Load jQuery From Google CDN in WordPress
in Optimization & Best Practice
jQuery is undoubtedly one of the most commonly used JavaScript framework these days. Some of the biggest websites out there use jQuery and there’s no question about why, it’s both easy to use and incredibly powerful. As a matter of fact, WordPress uses jQuery by default out of the box. In this article, we will show you how to replace the default WordPress jQuery script with Google hosted CDN jQuery.
There are many developer against the idea of loading jQuery from Google CDN in WordPress and many developers are in favor. The obvious reason for loading jQuery from Google CDN is website speed. It reduces website loading time because it decreases latency because jQuery script will be served by a Google server near your physical location, increases parallelism because browser will be able to download it simultaneously and provides better caching because chances are that it might have already been cached by browser from some other website. This makes loading of the jQuery script very fast on user’s end.
So if you want to reduce the loading time of your WordPress website than paste this code snippet in your functions.php file and see instant results and speed improvement. This code snippet will load jQuery v1.11.1 from Google CDN
// load jquery from google cdn in wordpress
function enqueue_jquery_google_cdn() {
    wp_deregister_script( 'jquery' );
    wp_register_script( 'jquery', 'http://ajax.googleapis.com/ajax/libs/jquery/1.11.1/jquery.min.js', false, NULL, true );
    wp_enqueue_script( 'jquery' );
}
add_action( 'wp_enqueue_scripts', 'enqueue_jquery_google_cdn' );You can change URL in above example to load specific version of jQuery. Links to other versions of jQuery are available on Google Developers Library website.
But if you want to load latest version of jQuery from Google CDN then use this URL below.
http://ajax.googleapis.com/ajax/libs/jquery/1/jquery.min.js
How to Add Meta Description Tag Without Plugin in WordPress
in Optimization & Best Practice
First of all, I’d highly recommend using a dedicated SEO plugin like WordPress SEO or All in One SEO Pack to optimize your website for search engines because they are experts in this field and they really know what they are doing. Also it will be highly effective to use latest SEO techniques from expert plugins instead of just adding meta description tag to head section of your website. However sometimes you don’t have an option to use a SEO plugin and you just need a way to add meta description onto your pages. For such cases, we will show you how to add meta description tag in your website without using any plugin.
For the sake of simplicity, we will be using first few lines of post content and add these to meta description tags to website head section automatically. So you can have meta description tags on your website without having to change anything.
Simply paste this WordPress code snippet in your theme’s functions.php file. This function will automatically create meta description tag in your website.
// add meta description tag without plugin in wordpress
function wcs_add_meta_description_tag() {
    global $post;
    if ( is_single() ) {
        $meta = strip_tags( $post->post_content );
        $meta = strip_shortcodes( $post->post_content );
        $meta = str_replace( array("\n", "\r", "\t"), ' ', $meta );
        $meta = mb_substr( $meta, 0, 125, 'utf8' );
        echo '<metaname="description" content="' . $meta . '" />' . "\n";
    }
}
add_action( 'wp_head', 'wcs_add_meta_description_tag' , 2 );
How to Add Meta Keywords Tag Without Plugin in WordPress
in Optimization & Best Practice
Last week, we have posted about how to add meta description tag to your WordPress website without using any plugins and in this article, we will be showing you a way to add meta keywords tag to head section of website. First of all before proceeding any further, I would again recommend you to use a dedicated SEO plugin for optimizing your website for search engines. Without any doubts, a dedicated SEO plugin is always a better choice because they utilize all latest SEO techniques to help you improve your website’s search engine ranking. But if you are still looking for an easy way to add meta keywords tag to website head without using any plugins then carry on with the article.
We will be using post categories and tags to create meta keywords tag and use WordPress action wp_head to automatically add it to website head. Following is a nice little WordPress function that will add post categories and tags to meta keywords on WordPress posts.
Simple paste this WordPress snippet to your theme’s functions.php file. You don’t need to change anything in this code, as it will work out of the box for any website.
// add post category slug to body class in wordpress
function wcs_add_meta_keywords() {
    global $post;
    if ( is_single() ) {
        $cats = get_the_category( $post->ID );
        $tags = get_the_tags( $post->ID );
        $keywords = '';
        foreach ( $cats as $cat ) {
            $keywords .= $cat->cat_name . ", ";
        }
        foreach ( $tags as $tag ) {
            $keywords .= $tag->name . ", ";
        }
        echo '<metaname="keywords" content="' . $keywords . '" />' . "\n";
    }
}
add_action( 'wp_head', 'wcs_add_meta_keywords' , 2 );
How to Disable WP Sitemap Generation for Oxygen Templates
One of the new features introduced in WordPress 5.5 is XML Sitemaps Functionality.
By default, XML sitemaps get generated for all post types, taxonomies and users. It does not make sense to have Oxygen Templates be included in the sitemaps at a URL like https://example.com/wp-sitemap-posts-ct_template-1.xml since these templates are not meant to be public-facing.
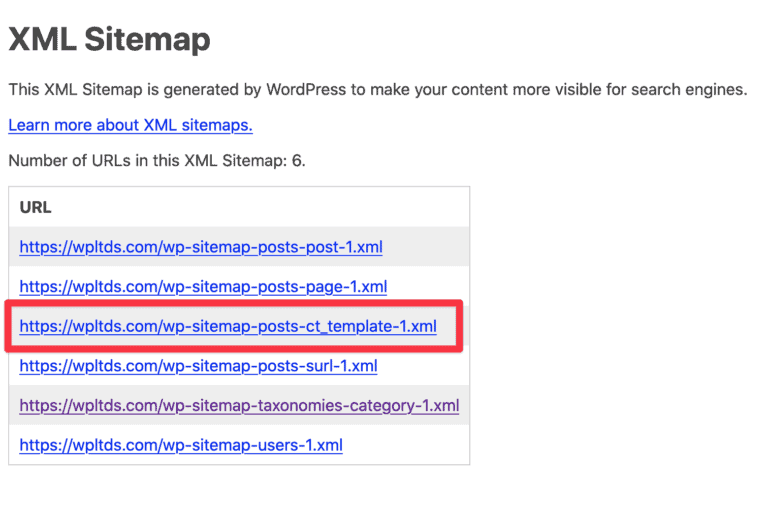
Clicking on the .xml link shows the list of templates like this:
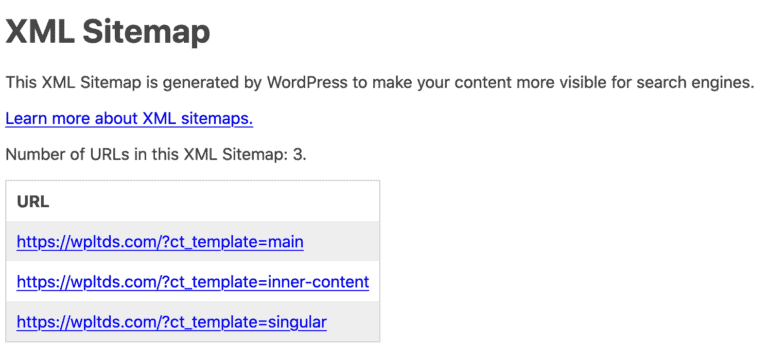
Here’s how we can tell WordPress to disable the XML sitemaps for Oxygen Templates:
Install and activate Code Snippets plugin.
Go to Snippets > Add New.
Title: Disable WP Sitemap Generation for Oxygen Templates
Code:
add_filter(
    'wp_sitemaps_post_types',
    function( $post_types ) {
        unset( $post_types['ct_template'] );
        return $post_types;
    }
);
Set the snippet to run everywhere. Save changes and activate.
That’s it.
If you wish to disable the XML sitemaps for multiple post types, simply add them in new lines in the unset() like so:
add_filter(
	'wp_sitemaps_post_types',
	function( $post_types ) {
		unset( $post_types['ct_template'] );
		unset( $post_types['surl'] );
		return $post_types;
	}
);
and to totally disable the WordPress XML sitemaps, use this code snippet:
add_filter( 'wp_sitemaps_enabled', '__return_false' );
Show Popular Posts Without Plugins
This one is a little trickier. However, if you are not too keen on installing an extra plugin to showcase popular posts (say, you have limited server memory or disk space), follow this snippet.
Paste the following in functions.php:
function count_post_visits() {
    if( is_single() ) {
        global $post;
        $views = get_post_meta( $post->ID, 'my_post_viewed', true );
        if( $views == '' ) {
            update_post_meta( $post->ID, 'my_post_viewed', '1' );
        } else {
            $views_no = intval( $views );
            update_post_meta( $post->ID, 'my_post_viewed', ++$views_no );
        }
    }
}
add_action( 'wp_head', 'count_post_visits' );
Thereafter, paste the following wherever in your template files that you wish to display the popular posts:
$popular_posts_args = array(
    'posts_per_page' => 3,
    'meta_key' => 'my_post_viewed',
    'orderby' => 'meta_value_num',
    'order'=> 'DESC'
);
$popular_posts_loop = new WP_Query( $popular_posts_args );
  while( $popular_posts_loop->have_posts() ):
    $popular_posts_loop->the_post();
    // Loop continues
endwhile;
wp_reset_query();
How To Reverse The WordPress Comment Order to Show Newest on Top
Whether your theme shows newest comments on top or oldest you may want to change the order of comments in WordPress. Seeing the latest comments on top can also help users engage more with your content. No matter what order you (or your visitors) prefer here are 2 simple ways to rearrange WordPress comments.
Using WordPress Comment Order Option
There is a built in option located in Settings/Discussion that will allow you to reverse the order of your WordPress comments.
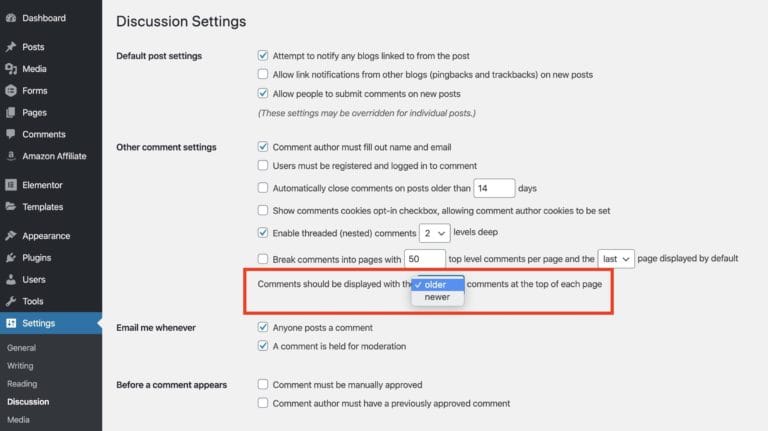
This method may not work with all themes so here is a functions.php snippet to reverse comment order.
Using Functions.php Snippet
| <?php | |
| //Reverse comment order | |
| function smartwp_reverse_comment_order( $comments ) { | |
| return array_reverse( $comments ); | |
| } | |
| add_filter (‚comments_array‘, ’smartwp_reverse_comment_order‘); |
This code snippet will reverse the order of your WordPress comments. This is helpful if the above option doesn’t work with your theme.
Leiten Sie den Besucher weiter, nachdem er eine Antwort gepostet hat
Wenn ein Besucher einen Kommentar gepostet hat, wird die Seite neu geladen und der Besucher verlässt die Seite häufig. Mit dieser Funktion senden Sie den Besucher nach dem Posten einer Antwort auf eine Seite Ihrer Wahl, um sich beispielsweise bei ihm zu bedanken oder ihn zu belohnen.
1 2 3 4 5 | add_filter('comment_post_redirect', 'redirect_after_comment'); function redirect_after_comment(){ wp_redirect('/thank-you-page/'); exit(); } |
Ändern Sie die Auszugslänge
Die Auszüge von Nachrichten werden beispielsweise auf Kategorieseiten angezeigt. Dies sind die kleinen Textteile, oft die ersten 75 Wörter einer Nachricht. Um diese Länge zu ändern, fügen Sie den folgenden Code in Ihre Datei functions.php ein .
add_filter('excerpt_length', 'nieuwe_excerpt_lengte'); function nieuwe_excerpt_lengte($len) { return 100; } |
Jetzt beträgt die Auszugslänge 100 Zeichen. Wenn Sie etwas anpassen möchten: Ändern Sie die Zahl ‚100‘.
‚Read more‘ nach dem Auszug
Einige Themen haben standardmäßig keinen Text „Read more“ hinter den Auszügen. Sie können dafür (natürlich) Plugins herunterladen, aber warum sollten Sie? Mit diesem kleinen Zusatz in Ihrer Datei functions.php haben Sie alles erledigt und sparen Ladezeit!
1 2 3 4 | function excerpt_readmore($more) { return ‚… <a href=“‚. get_permalink($post->ID) . ‚“ class=“readmore“>‘ . ‚Weiterlesen‘ . ‚</a>‘; } add_filter(‚excerpt_more‘, ‚excerpt_readmore‘); |
Leeren Sie den Papierkorb nach X Tagen automatisch
Um die Größe Ihrer Datenbank zu begrenzen, können Sie festlegen, dass Ihr Papierkorb nach X Tagen automatisch geleert wird. Platzieren Sie dieses Code-Snippet in Ihrer Datei wp-config.php über der Zeile /* That's all, stop editing! Happy blogging. */. Im folgenden Fall wird der Papierkorb nach 5 Tagen automatisch geleert. Ersetzen Sie 5durch die Anzahl der gewünschten Tage.
// Empty trash after X days
define('EMPTY_TRASH_DAYS', 5 );Zusätzlicher Tipp: Wenn Sie den Mülleimer ausschalten möchten, stellen Sie die Anzahl der Tage ein 0. Die Schaltfläche “ Papierkorb“ ändert sich dann in “ Dauerhaft löschen“ .
Beschränken Sie den Zugriff in der Medienbibliothek auf die eigenen Uploads eines Benutzers
Standardmäßig zeigt die WordPress-Medienbibliothek alle Bilder an, die für alle Benutzer / Autoren hochgeladen wurden. Wenn Sie eine Website mit mehreren Benutzern / Autoren haben, kann es hilfreich sein, die Anzeige der Uploads auf die Uploads des Benutzers / Autors zu beschränken.
/**
* Limit access to media library (users can only see/select own media).
*/
add_filter( 'ajax_query_attachments_args', 'wpsimpel_show_current_user_attachments' );
function wpsimpel_show_current_user_attachments( $query ) {
$user_id = get_current_user_id();
if ( $user_id && !current_user_can('activate_plugins') && !current_user_can('edit_others_posts')) {
$query['author'] = $user_id;
}
return $query;
}
Screenshots of External WordPress Pages Without a Plugin
This is a very simple URL script that will generate a screenshot of any website. Here is the URL:
http://s.wordpress.com/mshots/v1/http%3A%2F%2Fspeckyboy.com%2F?w=500
To see what the link above does, click here.
All you have to do is insert your required URL in the place of the ‘speckyboy.com’ part of the link and resize (‘w=500’) as required.
Reset Your WordPress Password
What would you do if you forget your WordPress Admin Password and you no longer have access to the admin area? To fix this all you have to do is jump to your PhpMyAdmin Sql-window and run the following command.
UPDATE `wp_users` SET `user_pass` = MD5('NEW_PASSWORD') WHERE `wp_users`.`user_login` =`YOUR_USER_NAME` LIMIT 1;
Display WordPress Search Terms from Google Users
If a visitor reached your site through Google’s search, this script will display the terms they searched for in order to find your site. Just paste it anywhere outside of the header section.
<?php
$refer = $_SERVER["HTTP_REFERER"];
if (strpos($refer, "google")) {
        $refer_string = parse_url($refer, PHP_URL_QUERY);
        parse_str($refer_string, $vars);
        $search_terms = $vars['q'];
        echo 'Welcome Google visitor! You searched for the following terms to get here: ';
        echo $search_terms;
};
?>
How To Load Google CDN jQuery In Your WordPress Theme
1 2 3 4 5 6 | add_action( 'wp_enqueue_scripts', 'register_jquery' ); function register_jquery() { wp_deregister_script( 'jquery' ); wp_register_script( 'jquery', ( 'http://ajax.googleapis.com/ajax/libs/jquery/1.7.2/jquery.min.js' ), false, null, true ); wp_enqueue_script( 'jquery' ); } |